Deploy a Private Docker Container Registry on Kubernetes (EKS)
Learn how to deploy a private Docker container registry on Kubernetes (EKS) using Terraform. This guide covers setting up an EKS cluster, deploying Kubernetes components, and configuring persistent storage, ensuring a scalable and secure setup. Ideal for those preparing for the CKA exam.


🙋♂️ Introduction
Hi Everyone, I'm Ankit Jodhani, a freelance DevOps engineer, and I love sharing my knowledge publicly. This blog is part of the #10WeeksofCloudOps series initiated by Piyush Sachdeva. I want to thank Piyush Sachdeva for providing valuable guidance through the journey.
📚 Synopsis
In this blog, we will deploy a private container registry on Kubernetes, specifically on AWS EKS. This project will be very useful if you are preparing for the Certified Kubernetes Administrator (CKA) exam. Our container repository will function similarly to Docker Hub, with an attached domain name, allowing you to push and pull images as you do with Docker Hub. We will also ensure our registry has a persistent volume to avoid losing container images in case of POD or Cluster failure.
🔸 Story
- First, we will create the AWS EKS Cluster and all related components, such as IRSA (IAM Role for Service Account), and deploy a Helm chart using Terraform.
- Once we have the infrastructure ready, we will deploy all the necessary Kubernetes components like
- ⚓ Kubernetes Components or Objects
- 🚀 Deployment
- 🛎️ Services
- 🔐 ConfigMap & Secret
- ⚙️ Ingress
- 🚨 Network Policy
- 📁 Persistent Volume
- 📂 Persistent Volume Claim
- 🗃️ Storage Class
- 🚧 Namespace
- After deploying the components, access the private docker container registry using the domain name attached to it.
✅ Prerequisites
- 📌 AWS Account
- 📌 Hosted zone in Route 53 (Domain name)
- 📌 Basic knowledge of Terraform
- 📌 Basic knowledge of Docker
🖥️ Local setup
📦 List of AWS services
- 👑 Amazon EKS
- 🌐 Amazon VPC
- 🔒 Amazon IAM
- 💻 Amazon EC2
- ⚖️ Amazon Autoscaling
- 🪣Amazon S3
- 🚀 DynamoDB
☸️ List of Kubernetes Tools & Drivers
- 🏋 AWS Load Balancer Controller
- 🌐 ExternalDNS
- 📂 EFS CSI Driver (EKS Addon)
🎯 Architecture
It's time to understand the architecture of the project. Understanding the architecture of the project simplifies the process and boosts confidence in following the steps.
🚀 Step-by-Step Guide
- Please clone the Github repository on your local computer.
git clone https://github.com/AnkitJodhani/eks-private-container-registry.git

cd eks-private-container-registry
- You will find two directories inside the directory.
📂eks-private-container-registry
├──📁kubernetes
│   └── It has all the Kubernetes manifest
├──📁 terraform
│   └── It has all the Terraform script
└──😺.gitignore
- First, we will create the whole infrastructure using Terraform. so please navigate to the
terraform/maindirectory
cd eks-private-container-registry/terraform/main
- Here you will find all the configuration files like
backend.tfproviders.tfandterraform.tfvars. You can customize them as needed, but the default settings work fine for this project. - Now, lets initlize the terraform
terraform init
- validate the script
terraform validate
- let's see the plan of what Terraform going to install for us
terraform plan
- VPC, IAM Roles, EKS Cluster + Managed NodeGroup, EFS CSI driver (using AWS Addon) + IRSA (IAM role for service account), AWS Load Balancer Controller (using Helm Chart)+IRSA (IAM role for service account), ExternalDNS(using Helm Chart) + IRSA (IAM role for service account)
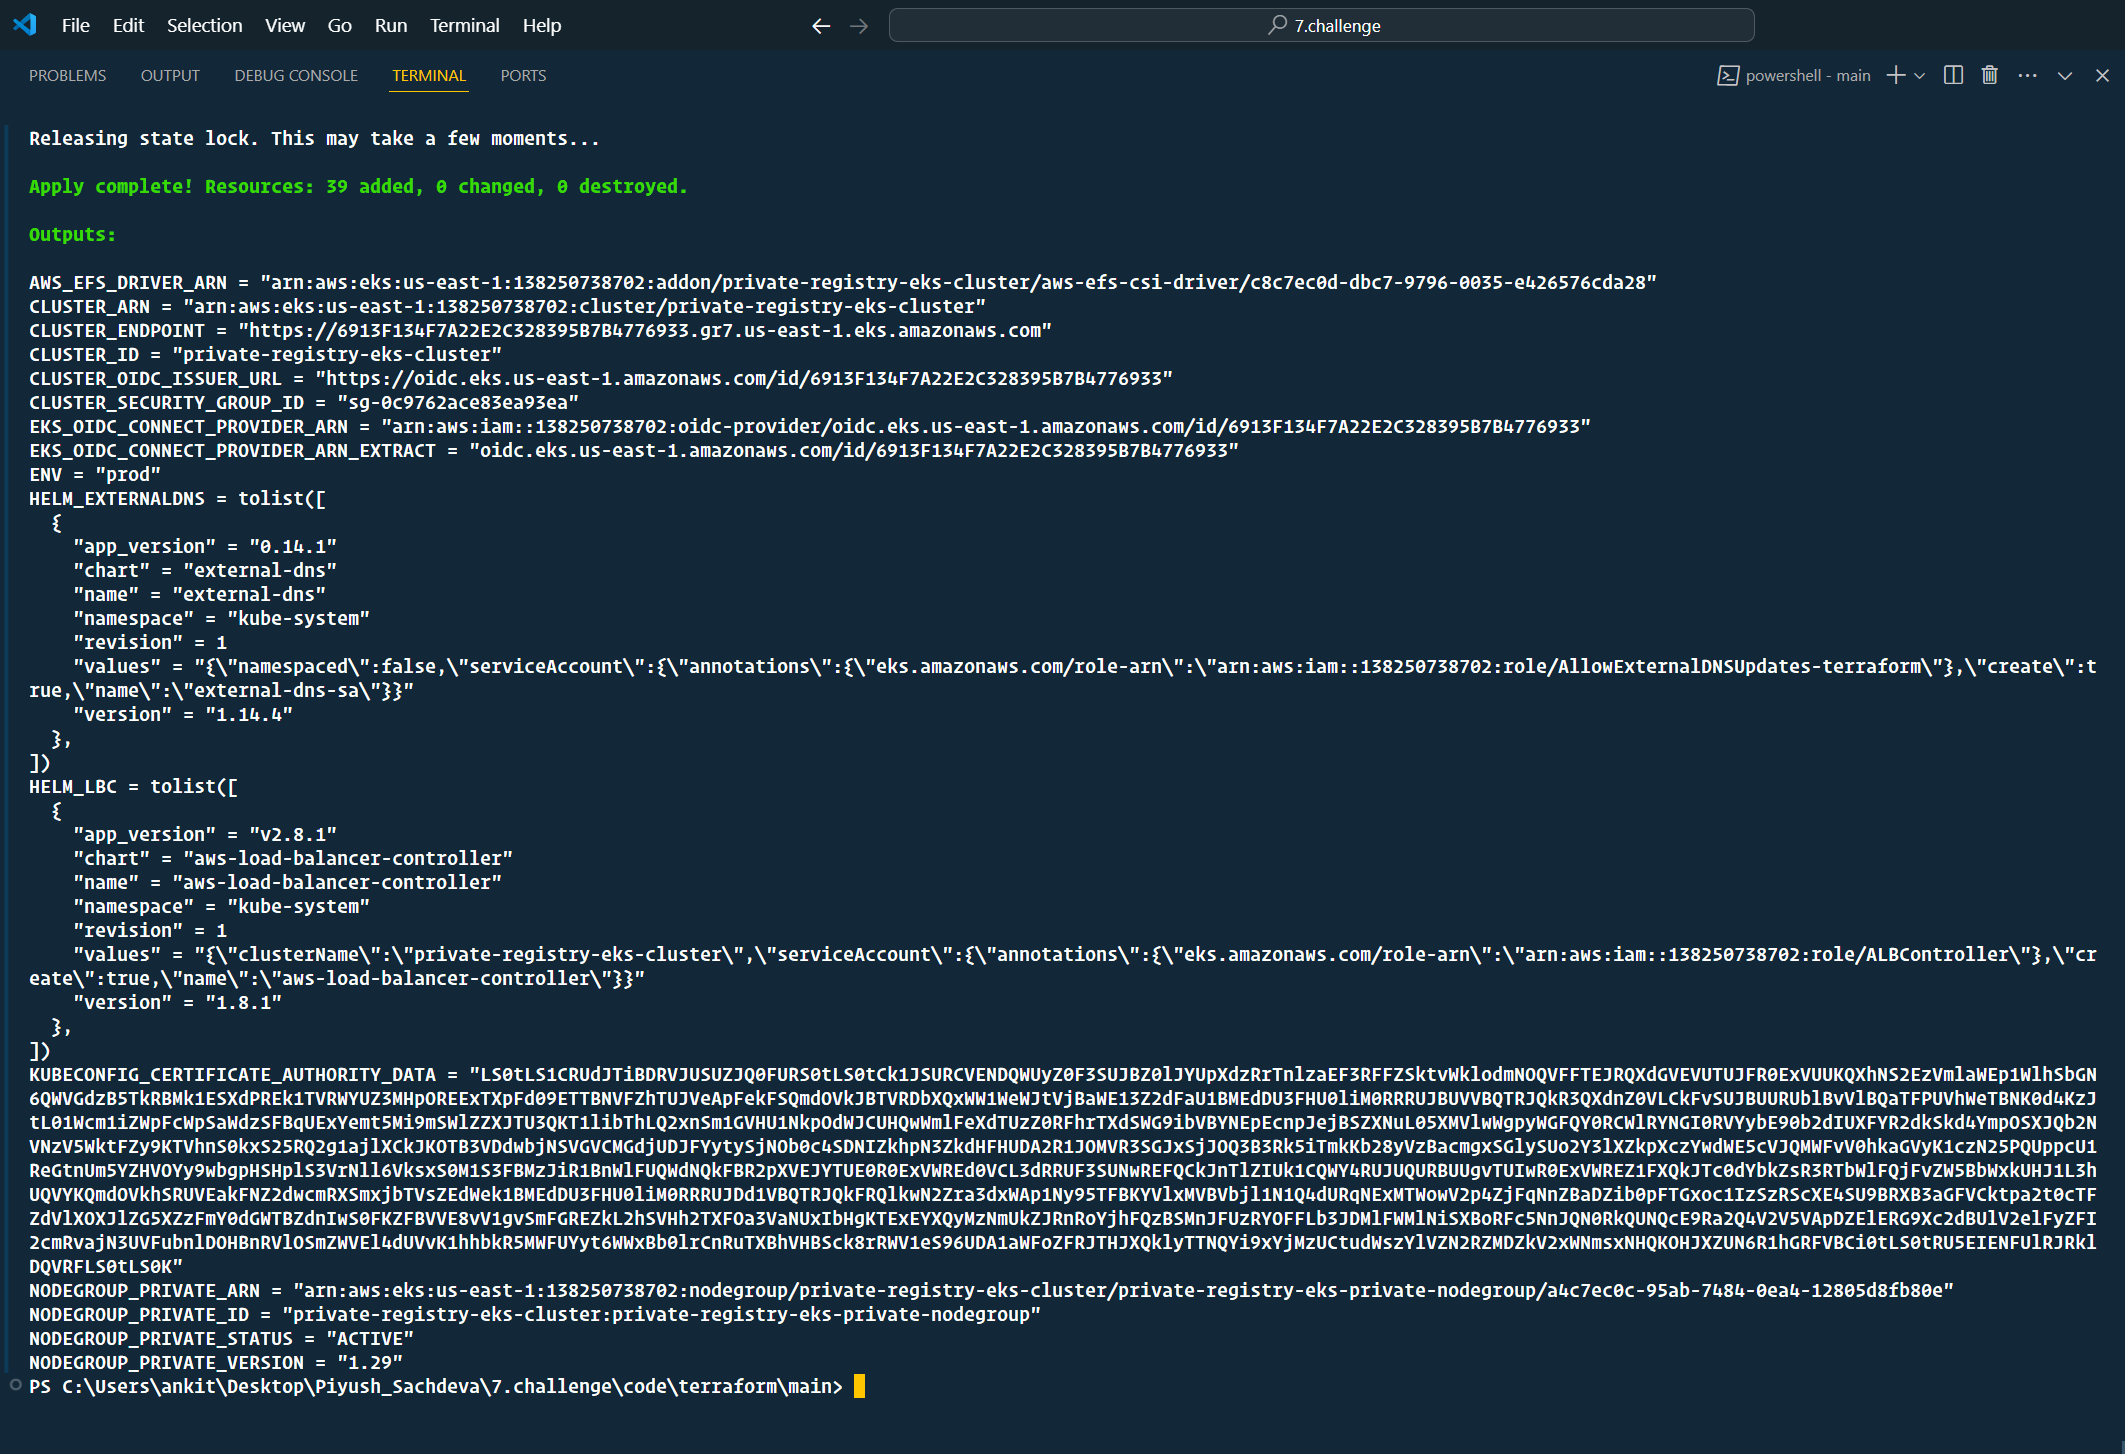
- It's time to trigger terraform and wait for the infrastructure to come up.
terraform apply --auto-approve
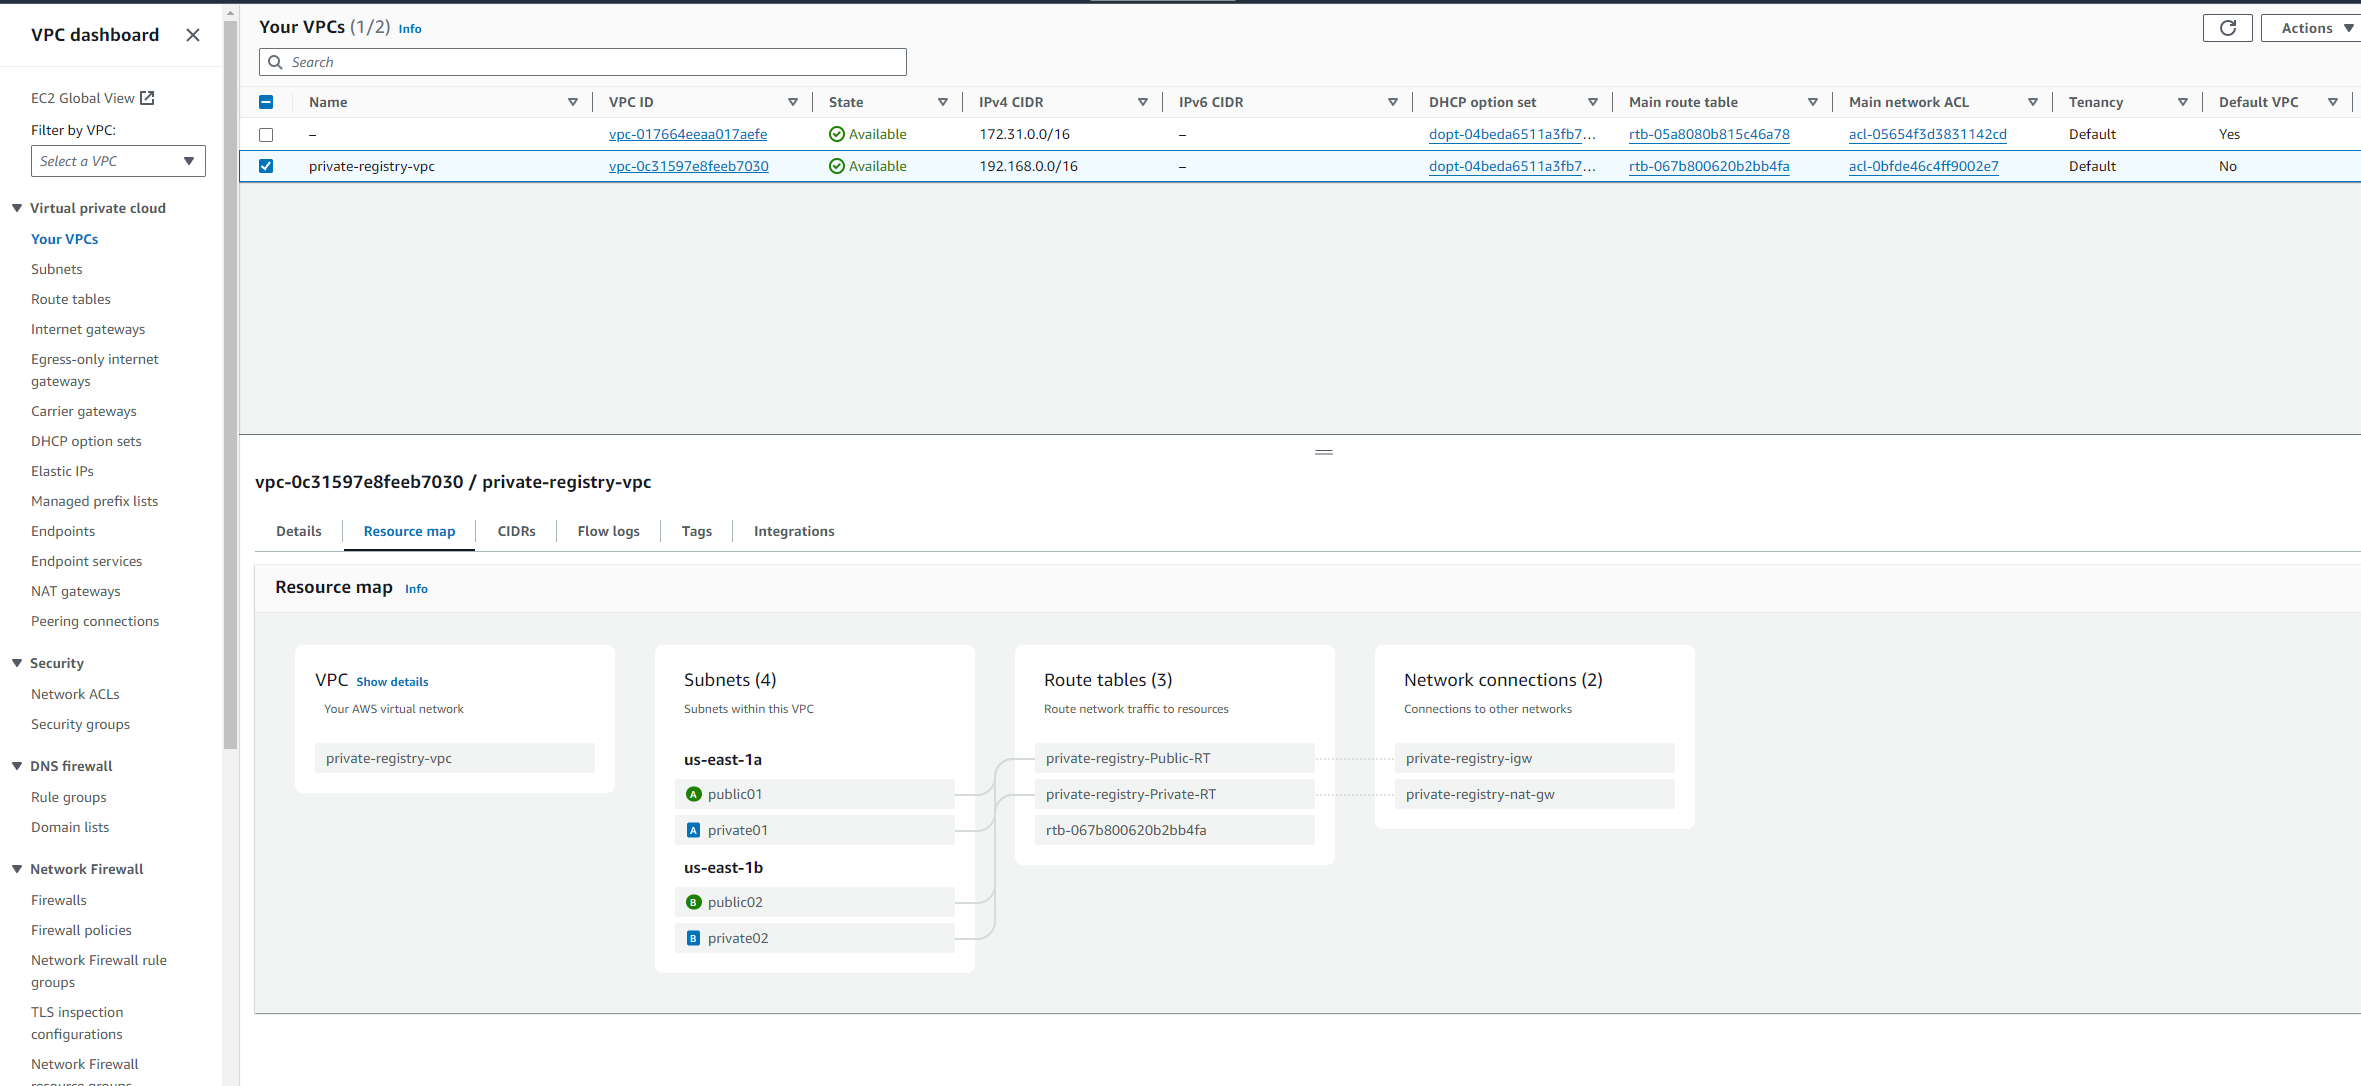
- Once, the above command executes successfully, we can go ahead and visit the AWS console to verify everything.


- Let's review all the components in Kubernetes.
aws list-clusters --region us-east-1

aws update-kubeconfig --name private-registry-eks-cluster --region us-east-1

kubectl get pods -n kube-system
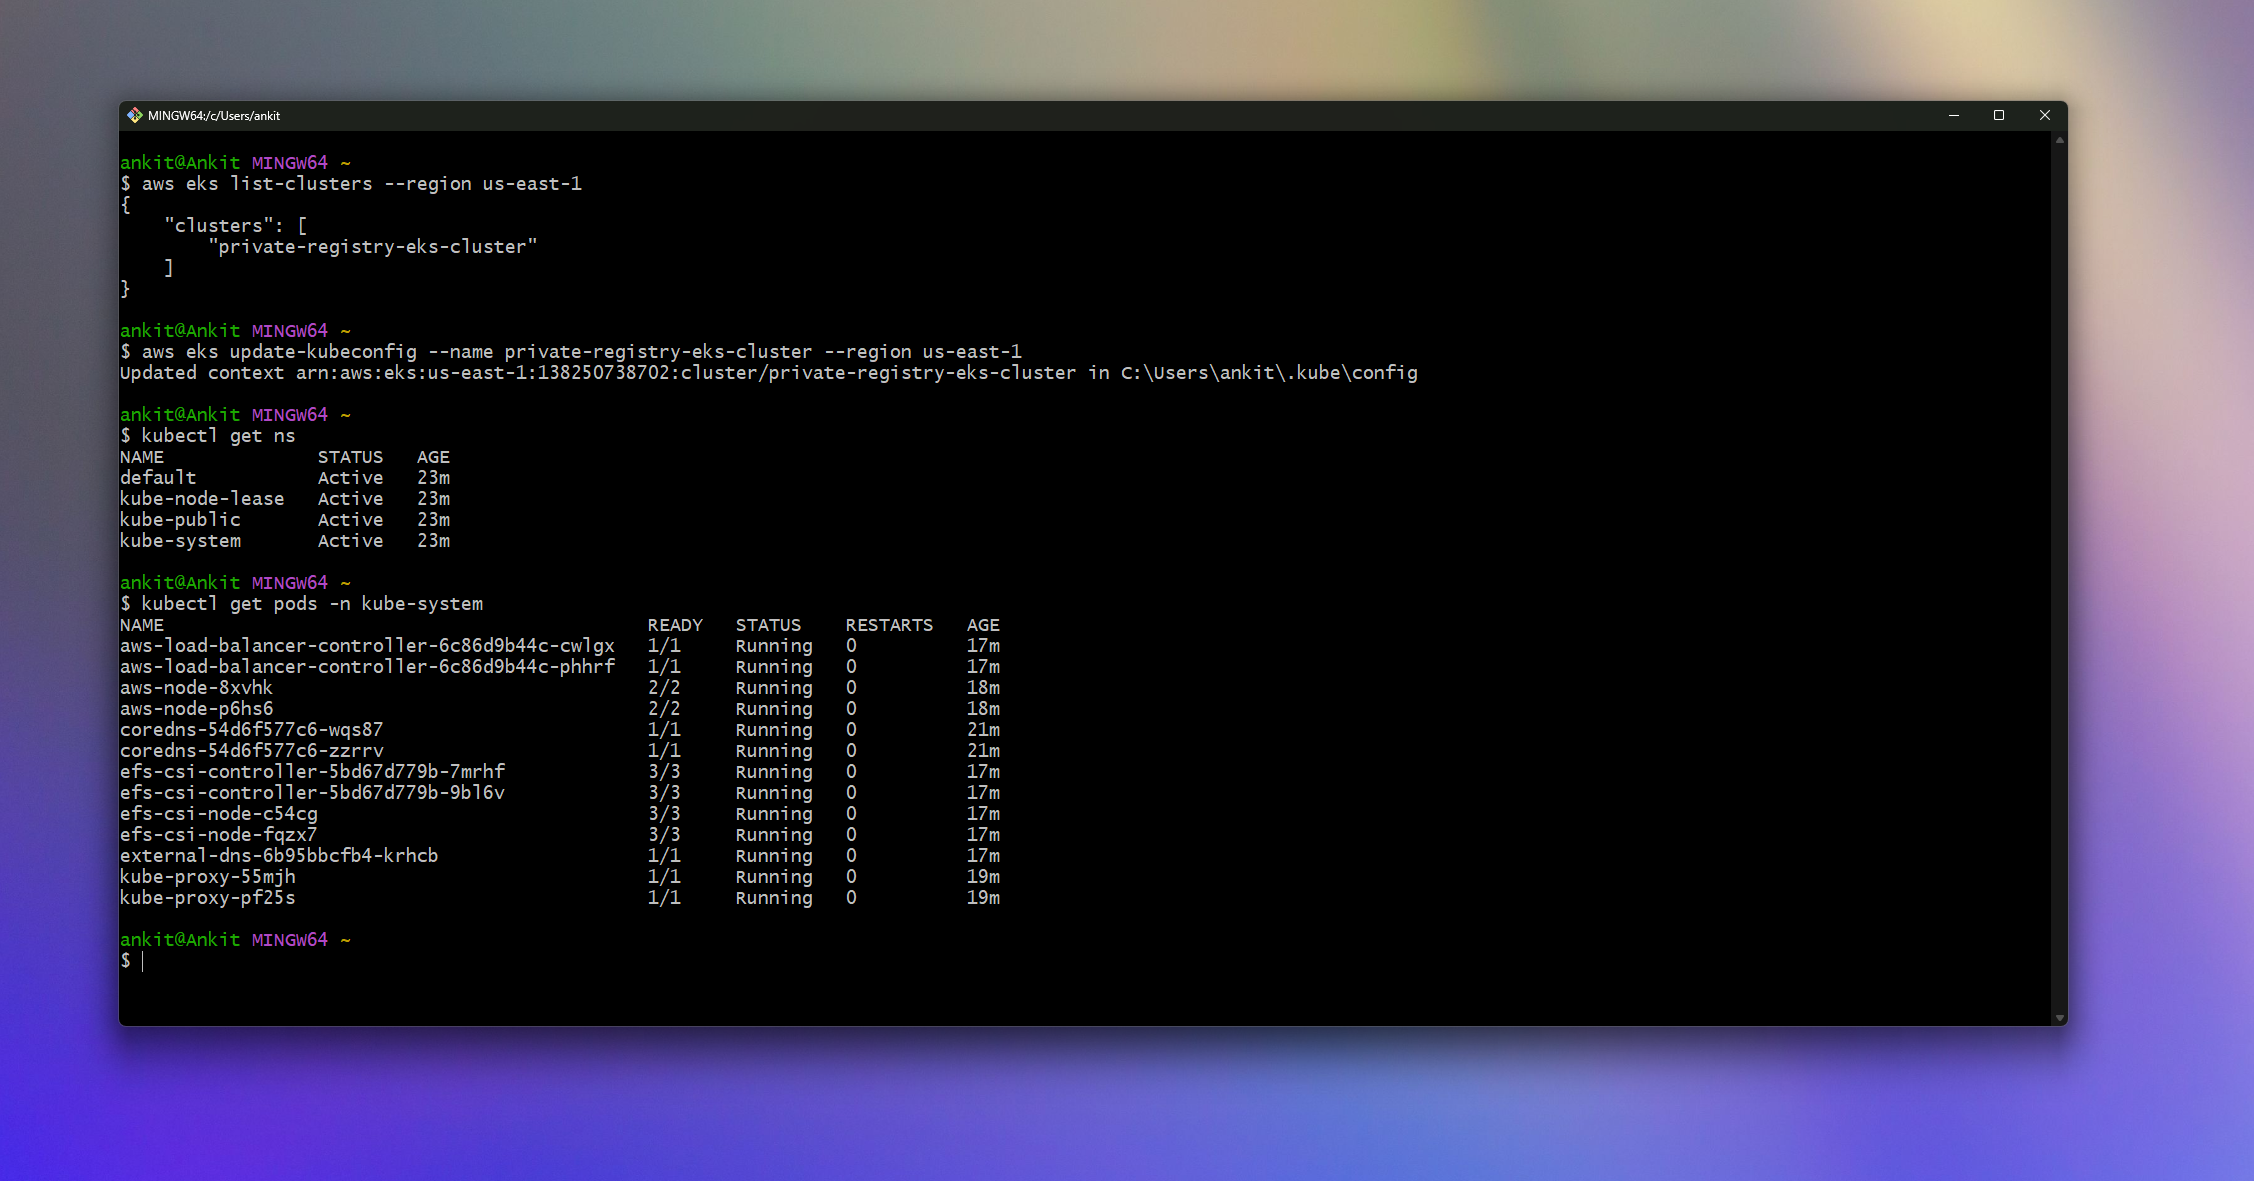
- Yeah!! Our infrastructure is up & running.. now let's apply our Kubernetes manifest files but before we do that, we have to create a File System inside AWS EFS where registry pods will store our container images to persist data in case of pod or cluster failure.
- Navigate to AWS EFS and create a file system. You can name it anything, but ensure you select the VPC where we created our infrastructure. Refer to the screenshot below for guidance.
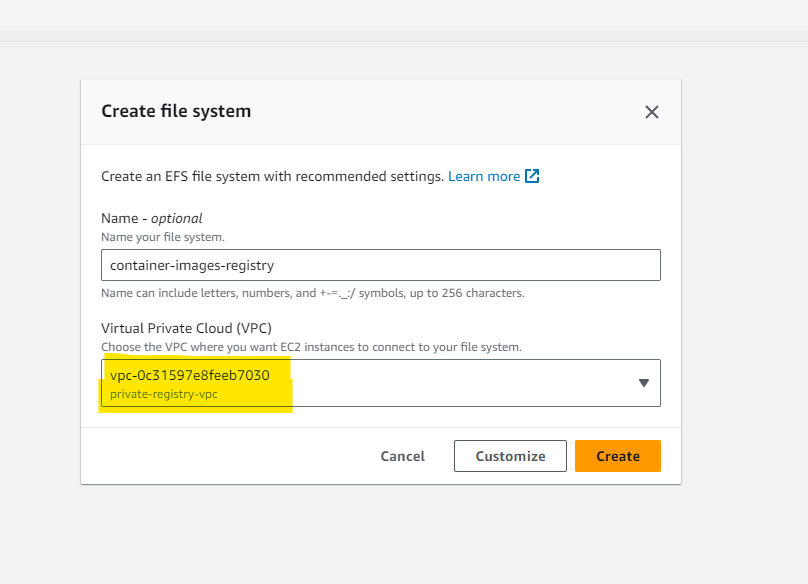
- Once the file system is created, make a note of the file system ID, as we need to add it to the Kubernetes manifest
storageclass.ymlfile located in the Kubernetes directory. Add the file system ID as shown in the image below.

- You can find
storageclass.ymlfile inside the Kubernetes directory. and add the File-system ID as shown in the below image.

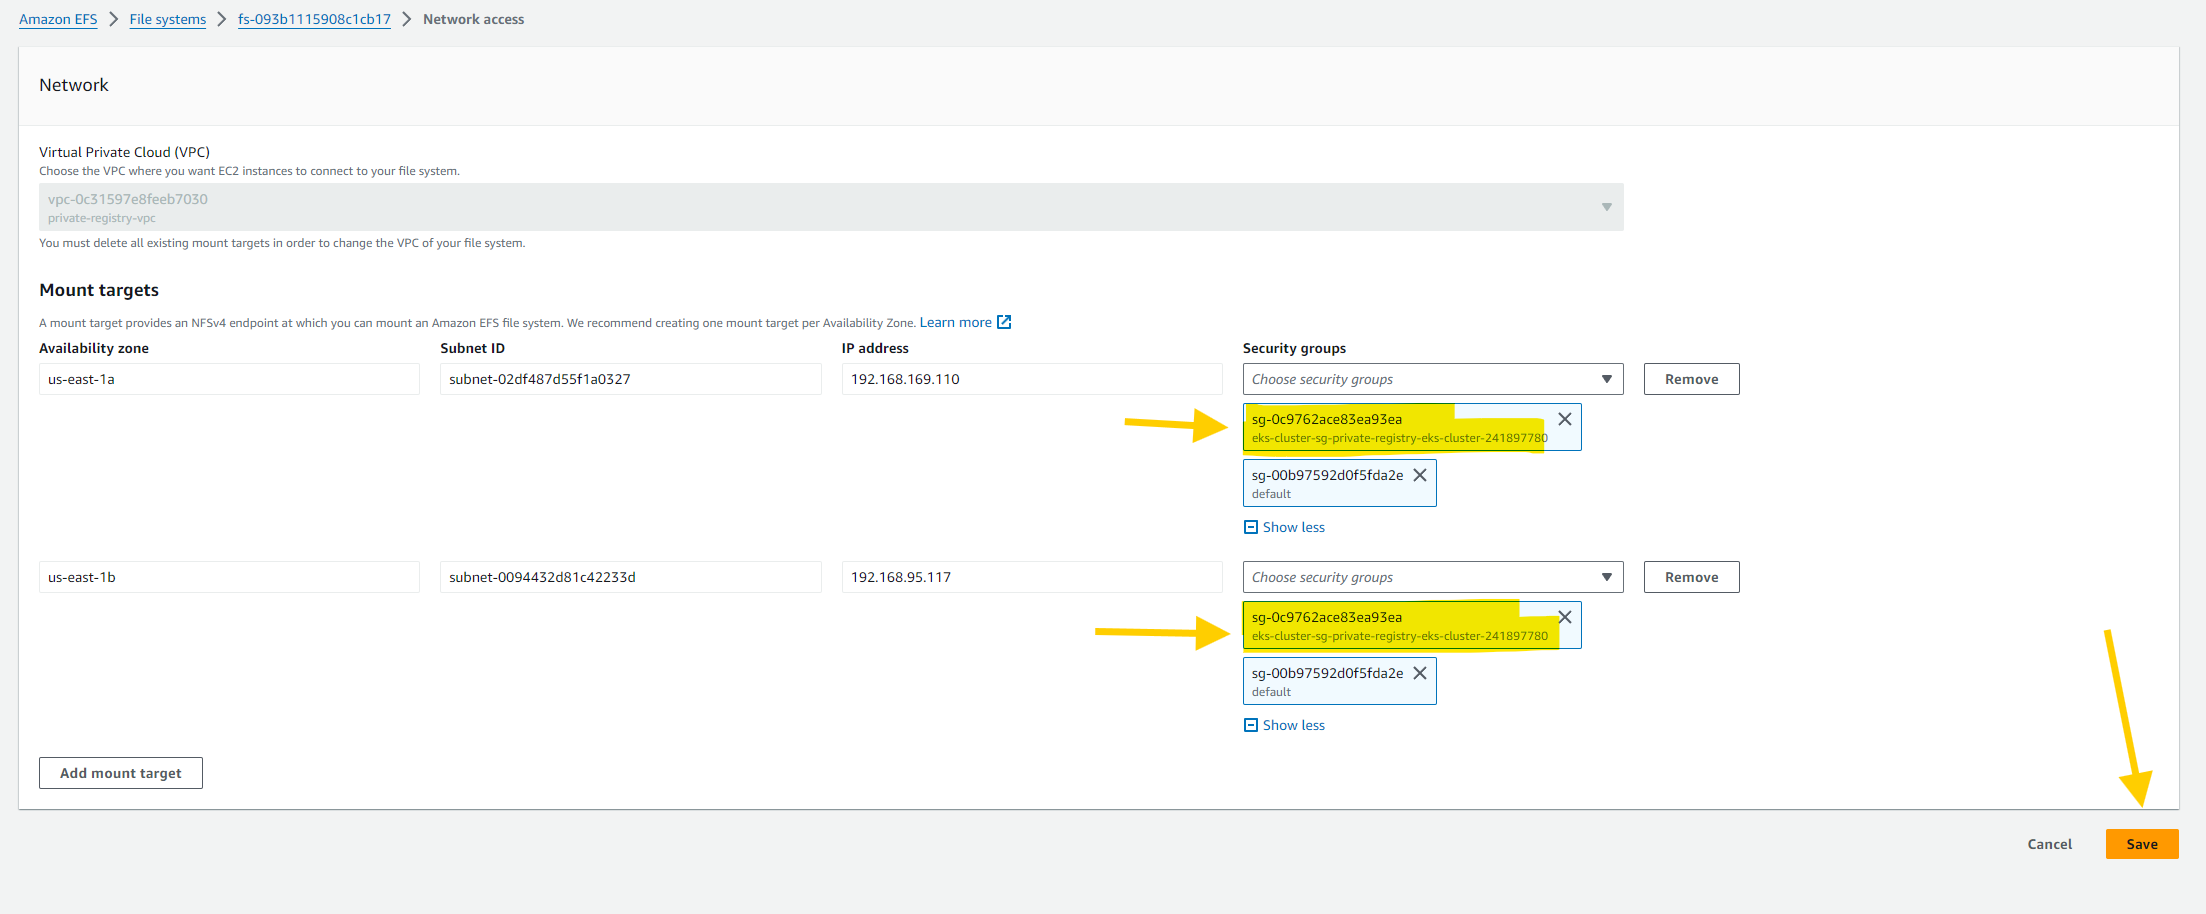
- We need to modify the file system's security group. Go to the AWS EFS console and navigate to the network section.
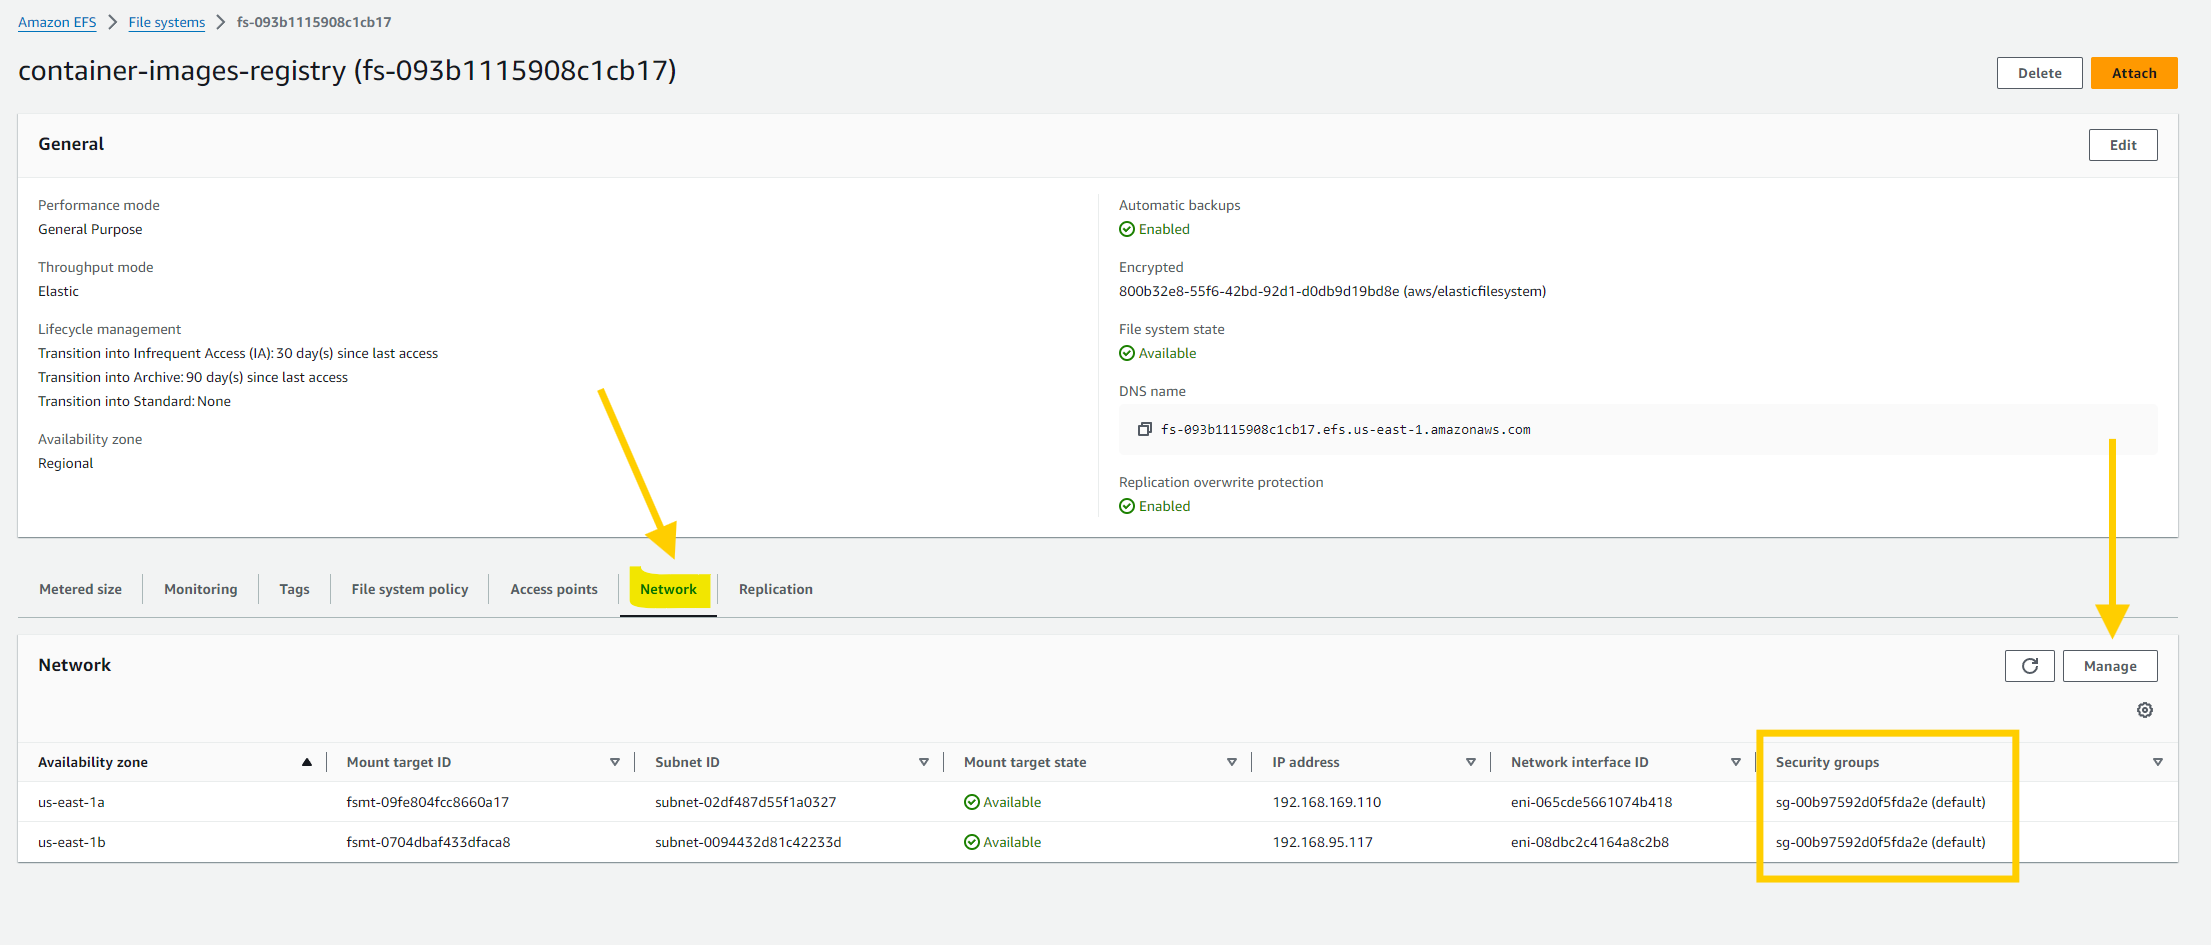
- Add the security group of the node so that our worker node can communicate with the file system. Without adding the security group, our worker node can't store images in the file system, and Kubernetes will not be able to bind the volume. Refer to the screenshot below for guidance.
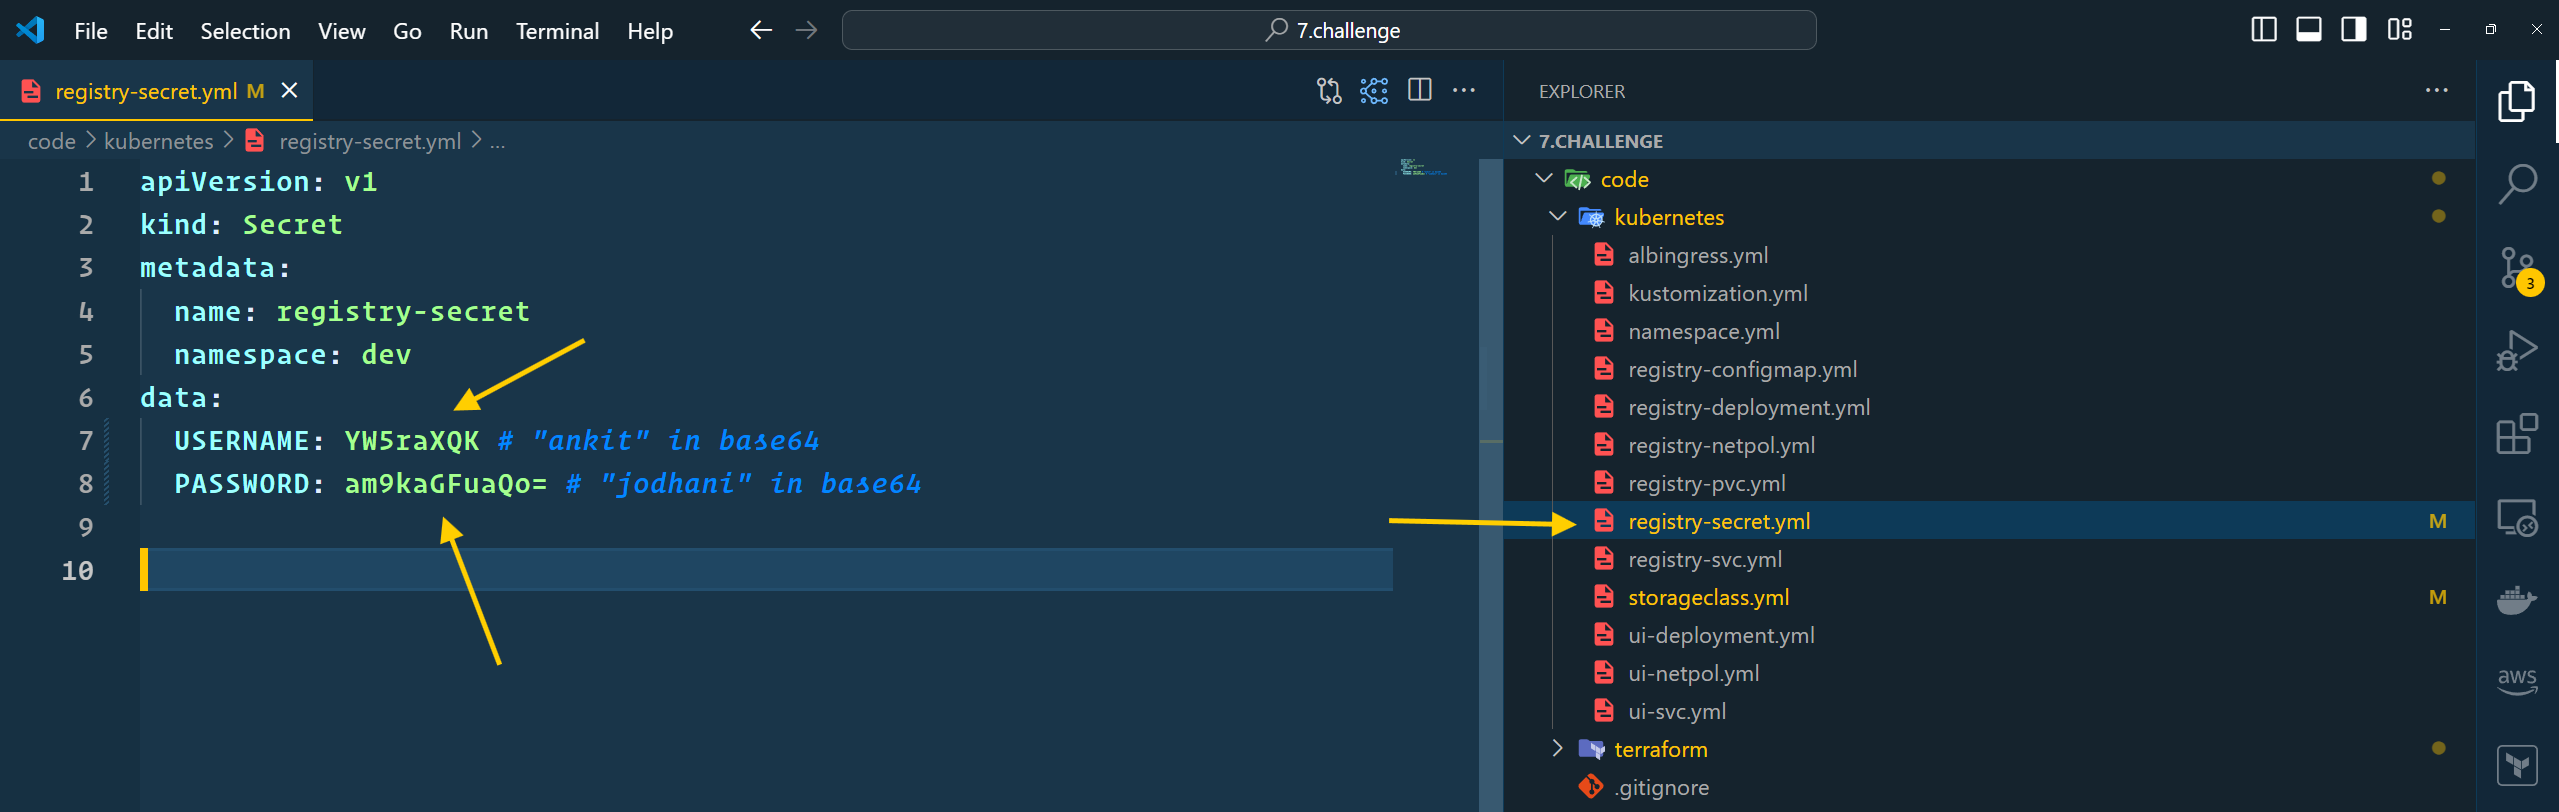
- You may want to change the
usernameandpasswordof your private docker container registry. you can do that by editingkubernetes/registry-secret.ymlfile. but your username and password must be in base64 format. - To convert normal text to base64 visit this site
- As I discussed earlier, we should have a hosted zone inside AWS Route53 so that ExternalDNS will automatically insert or update records that point to the application load balancer.

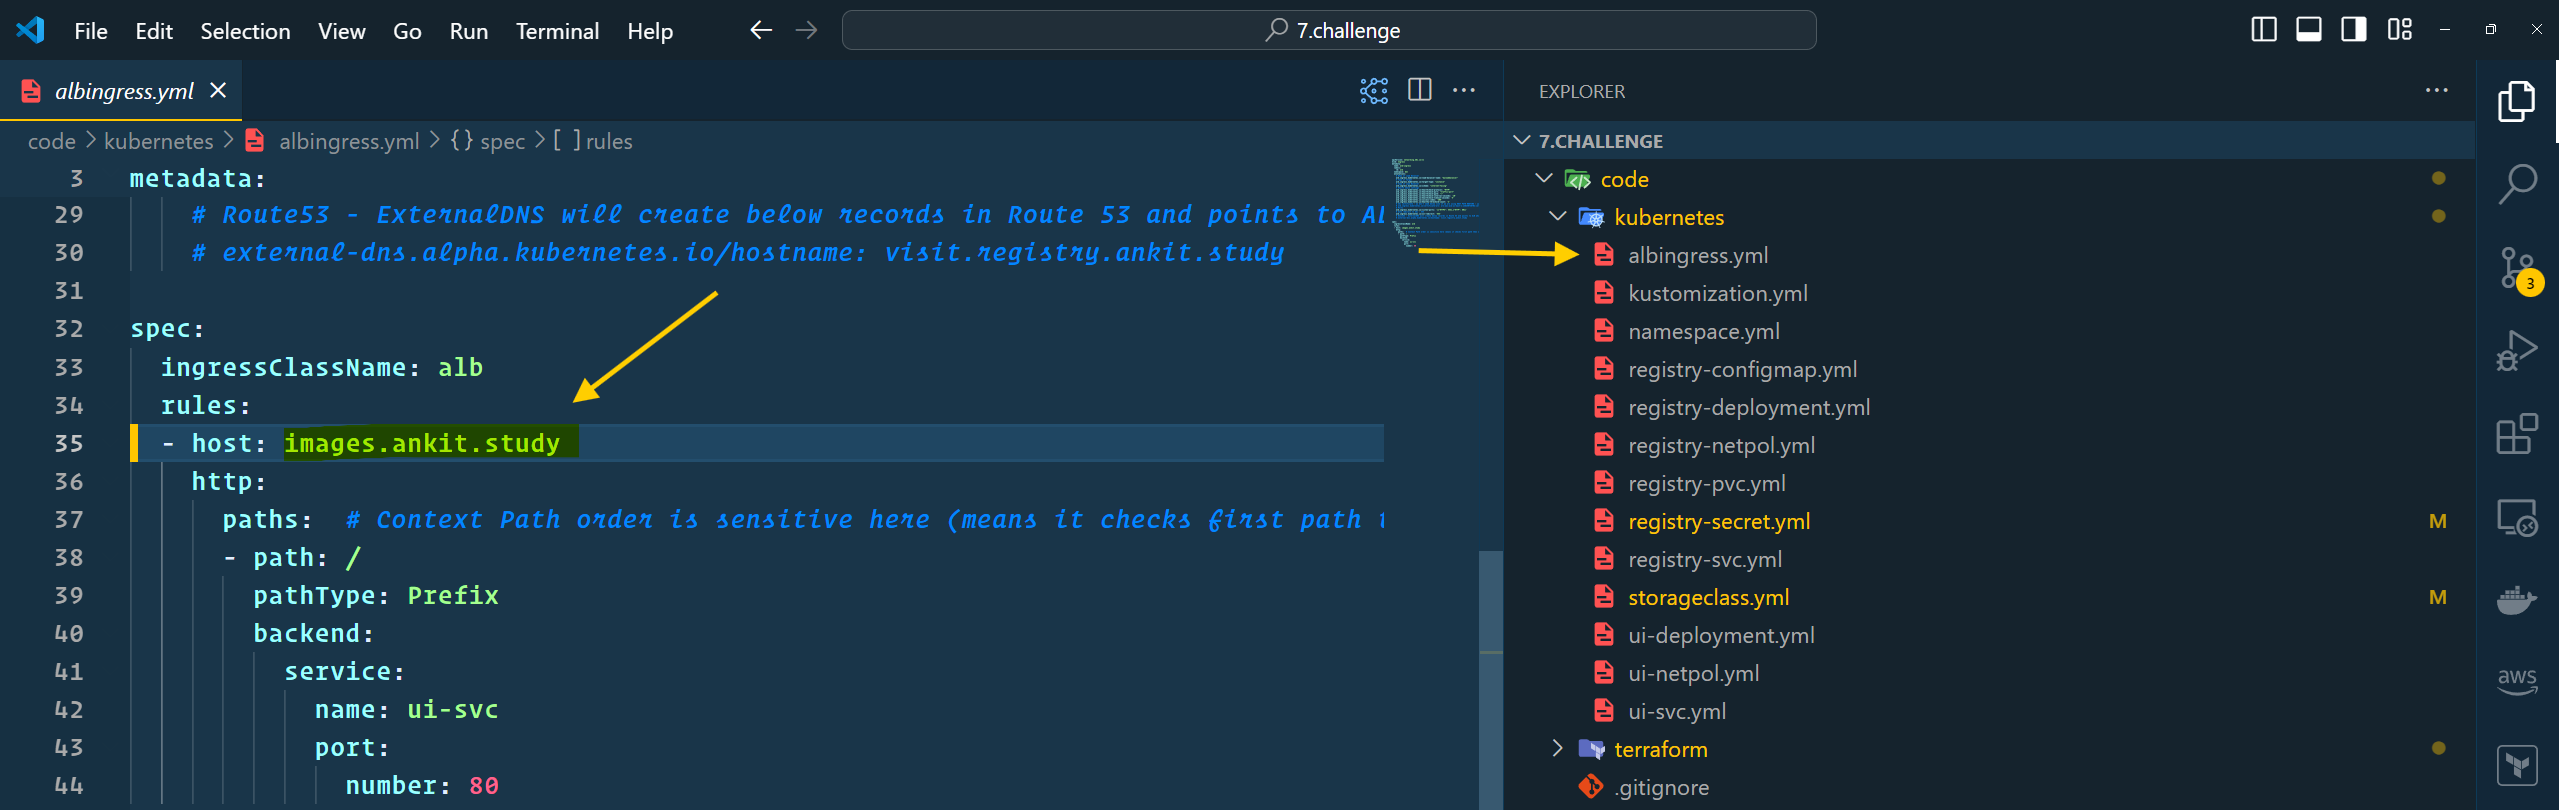
- You have to change the domain name inside
kubernetes/albingress.ymlfiile as per your domain name.
- With that, we are done with all configurations. now let's apply all Kubernetes manifest files. Execute the below command in your terminal
cd eks-private-container-registry

kubectl apply -k kubernetes/

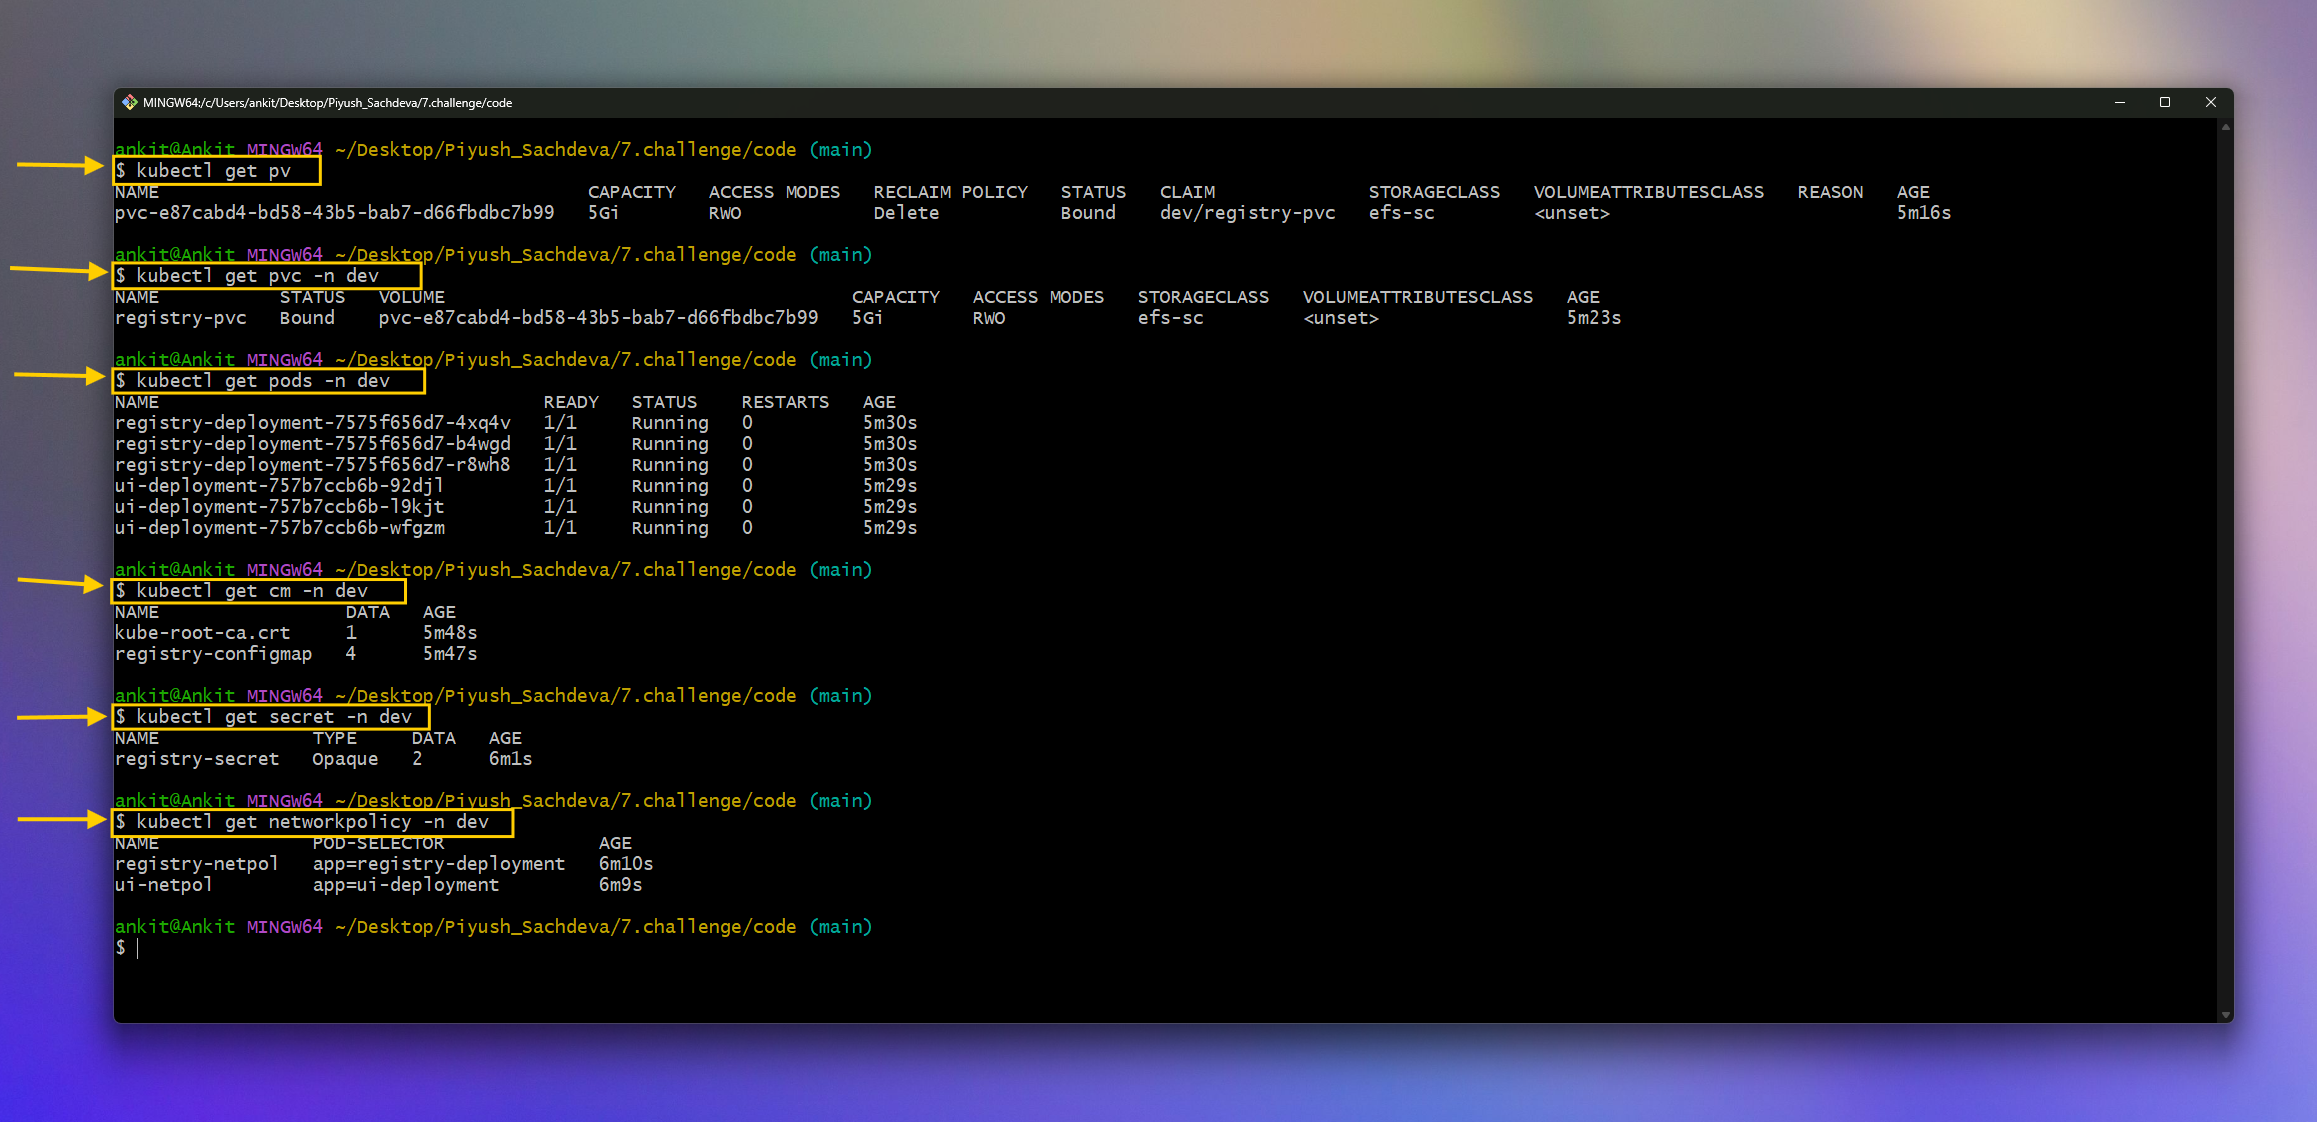
- let's verify all the components that have been deployed
kubectl get pv

kubectl get pvc -n dev

kubectl get pods -n dev

kubectl get cm -n dev

kubectl get secret -n dev

kubectl get networkpolicy -n dev
- We can also verify the Load Balancer created by the ALB Load Balancer Controller by going to the AWS console.

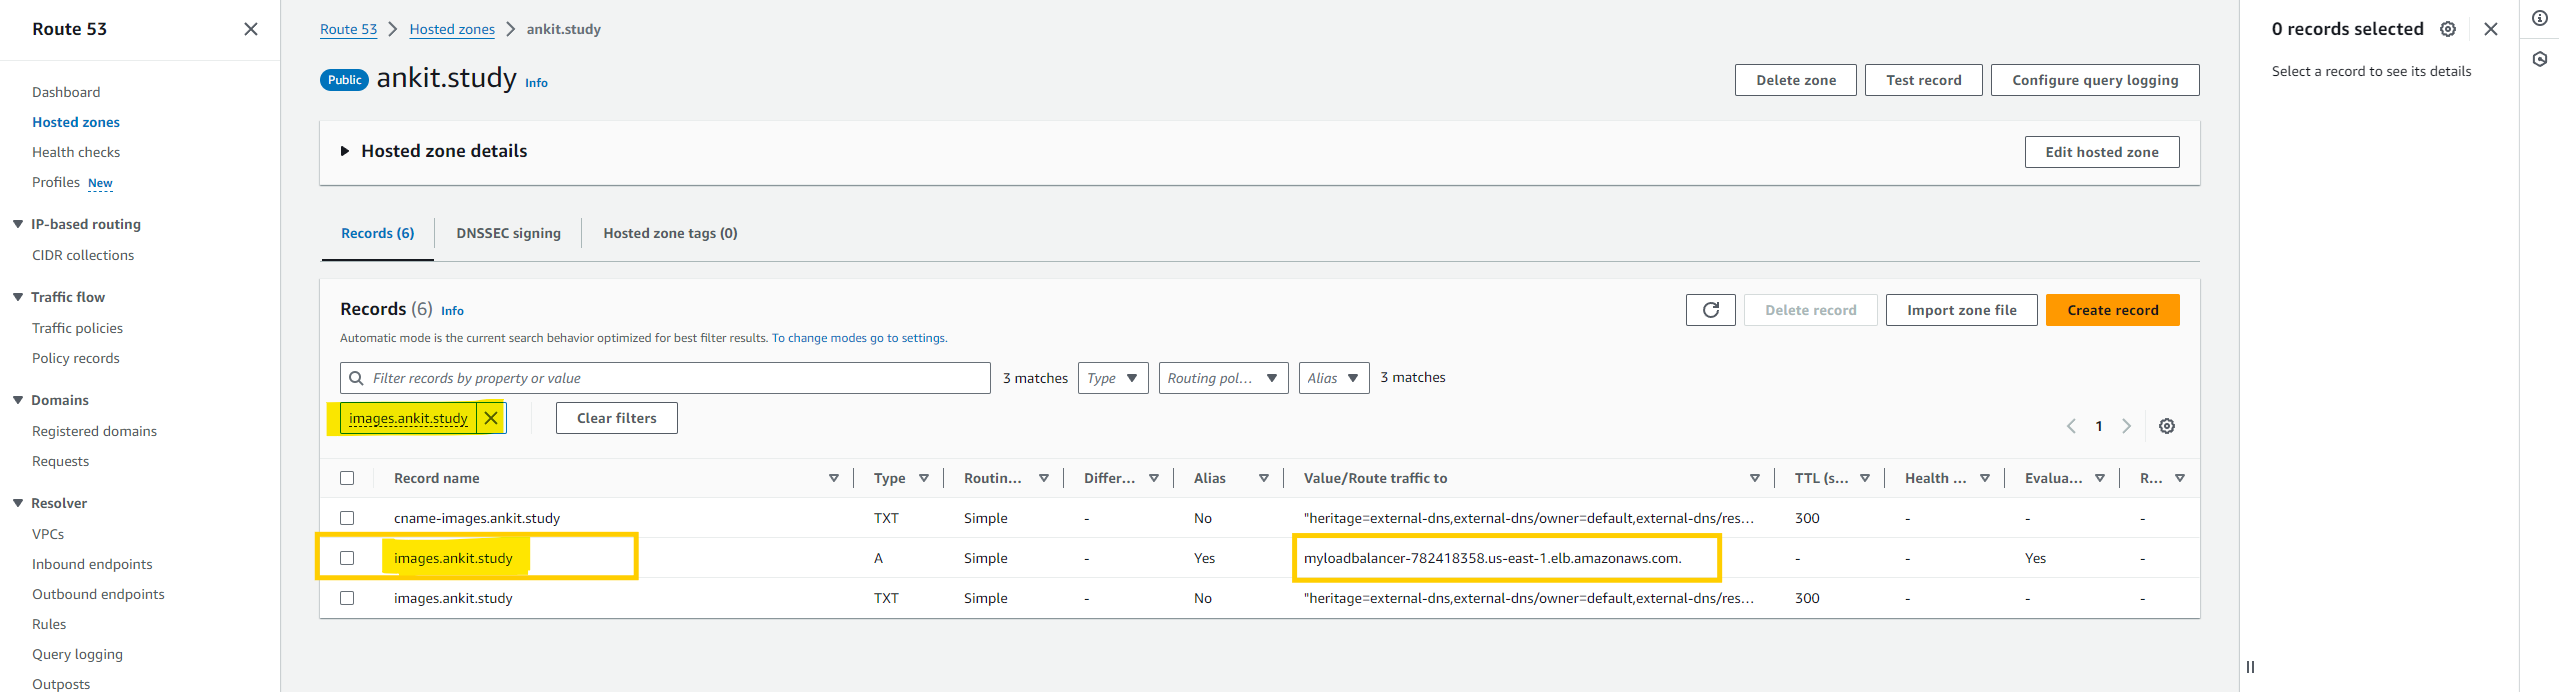
- We can also see the inserted records inside our hosted zone in route 53
- With that, our private Docker container registry is successfully set up. It's time to test it.
🧪 Testing
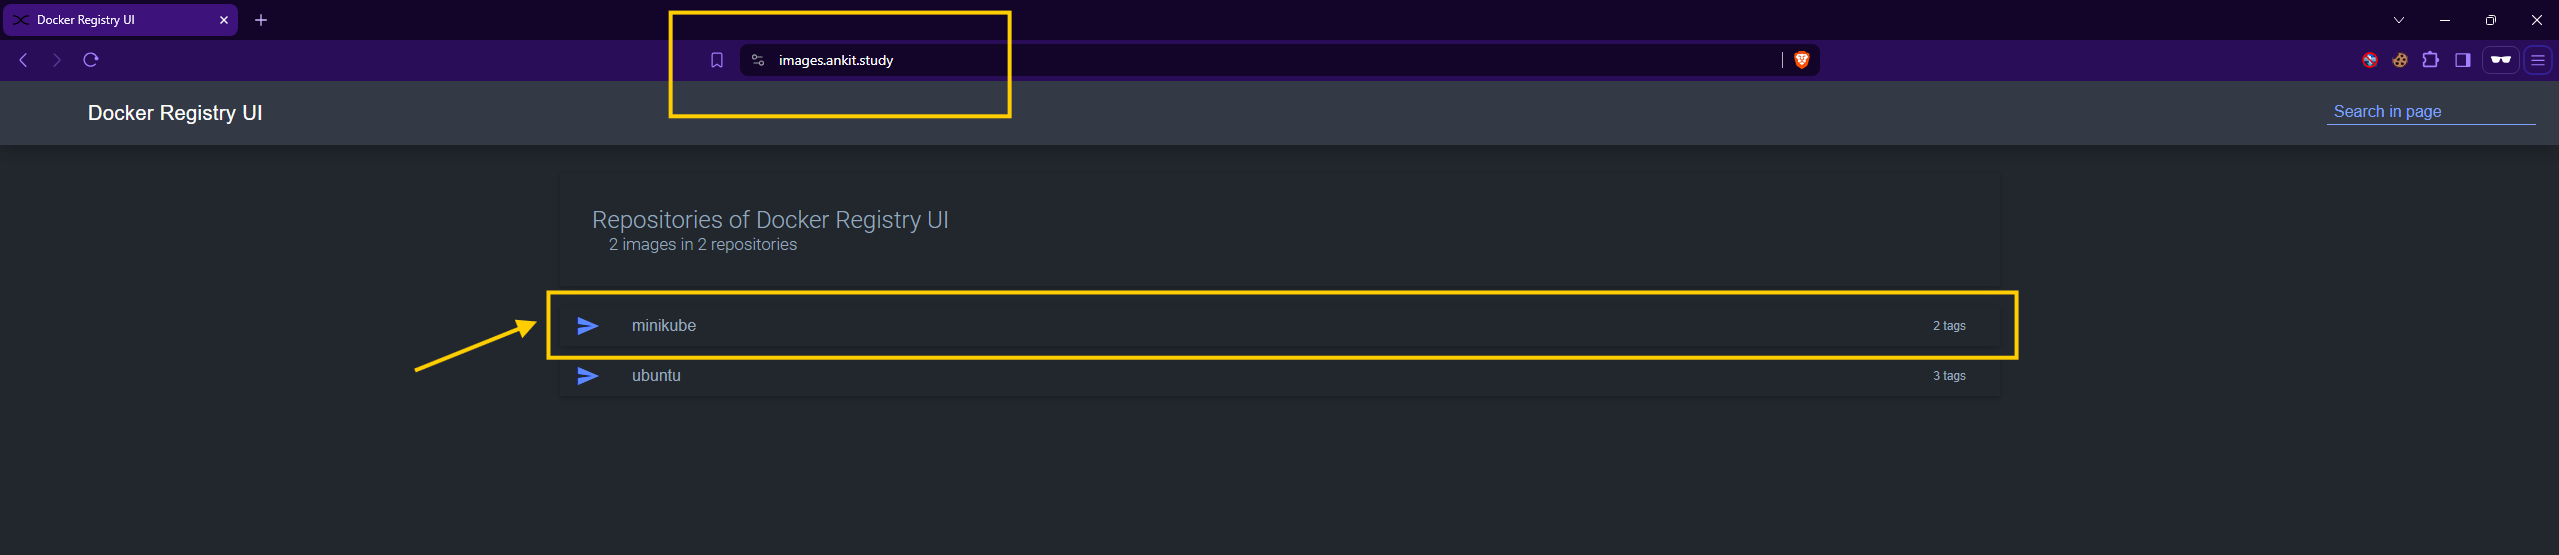
- Please type your registry domain name inside your favorite browser to see the User interface. In my case it is
images.ankit.study. and enter yourusernameandpasswordthat you've configured.

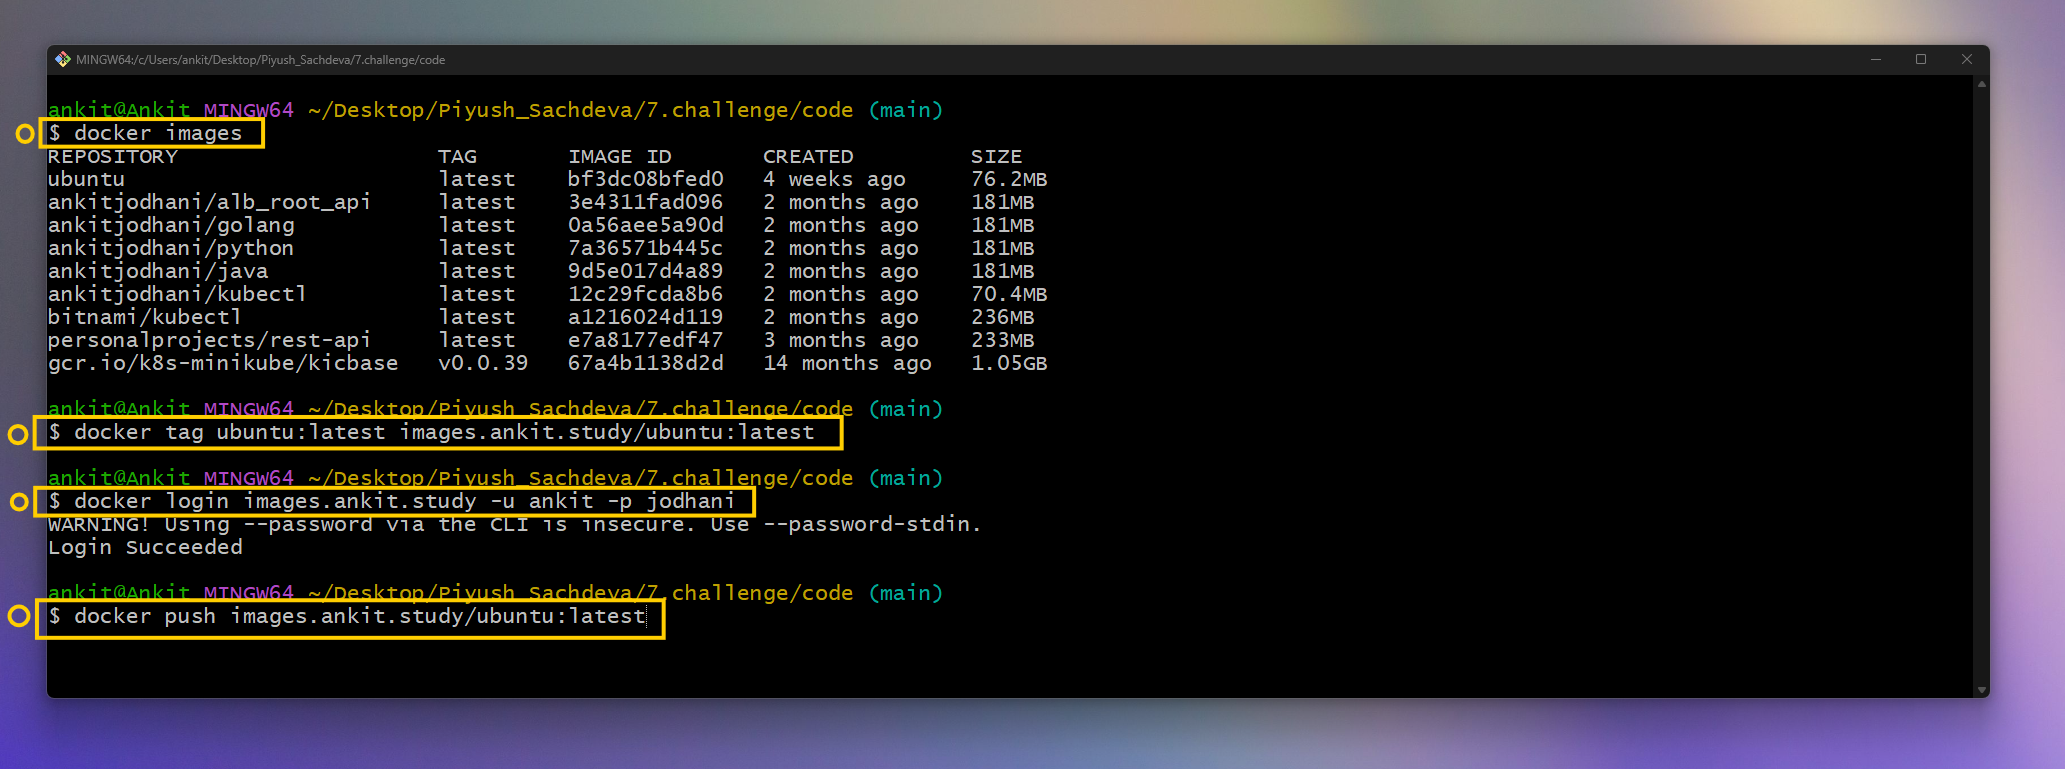
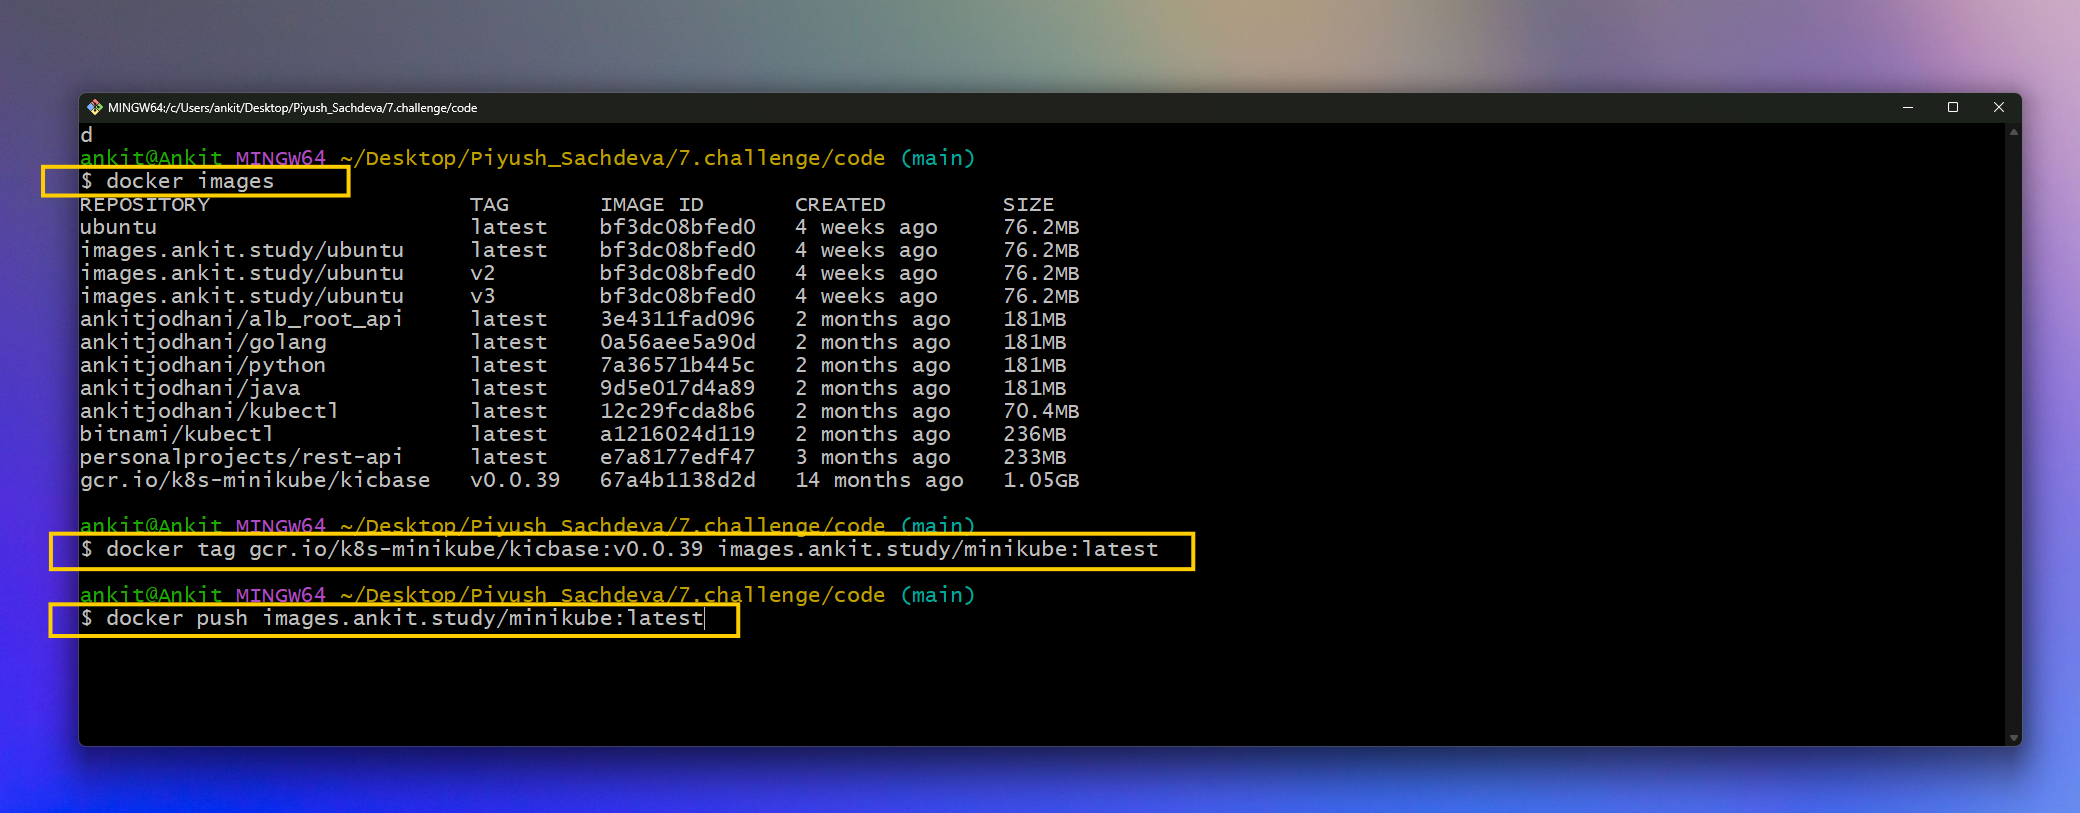
- Now, let's try to push some docker container images to our private registry. you can refer to below commands but you have to change domain name to your domain name.
# List all the images
docker images

# Rull ubuntu images from docker hub
docker pull ubuntu

# Rename images --------<<YOUR_DOMAIN_NAME>>
docker tag ubuntu:latest images.ankit.study/ubuntu:latest

# Login to our registry
# docker login YOUR_DOMAIN_NAME -u USERNAME -p PASSWORD
docker login images.ankit.study -u ankit -p jodhani

# Push docker image
docker push images.ankit.study/ubuntu:latest
- Let's review the recently pushed image by going to the browser.

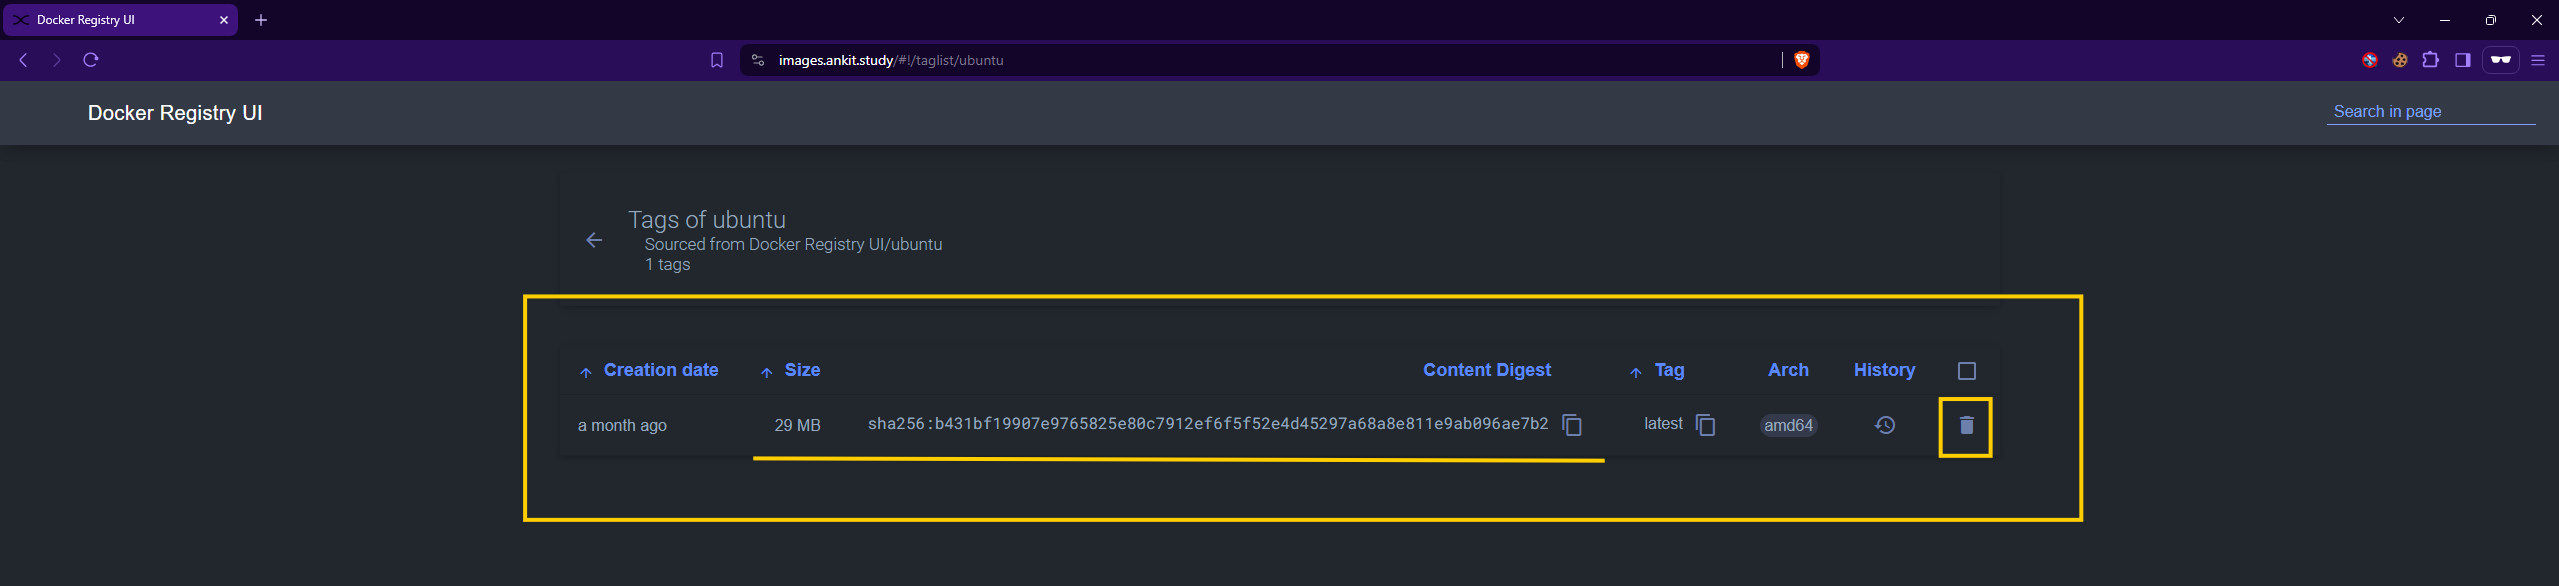
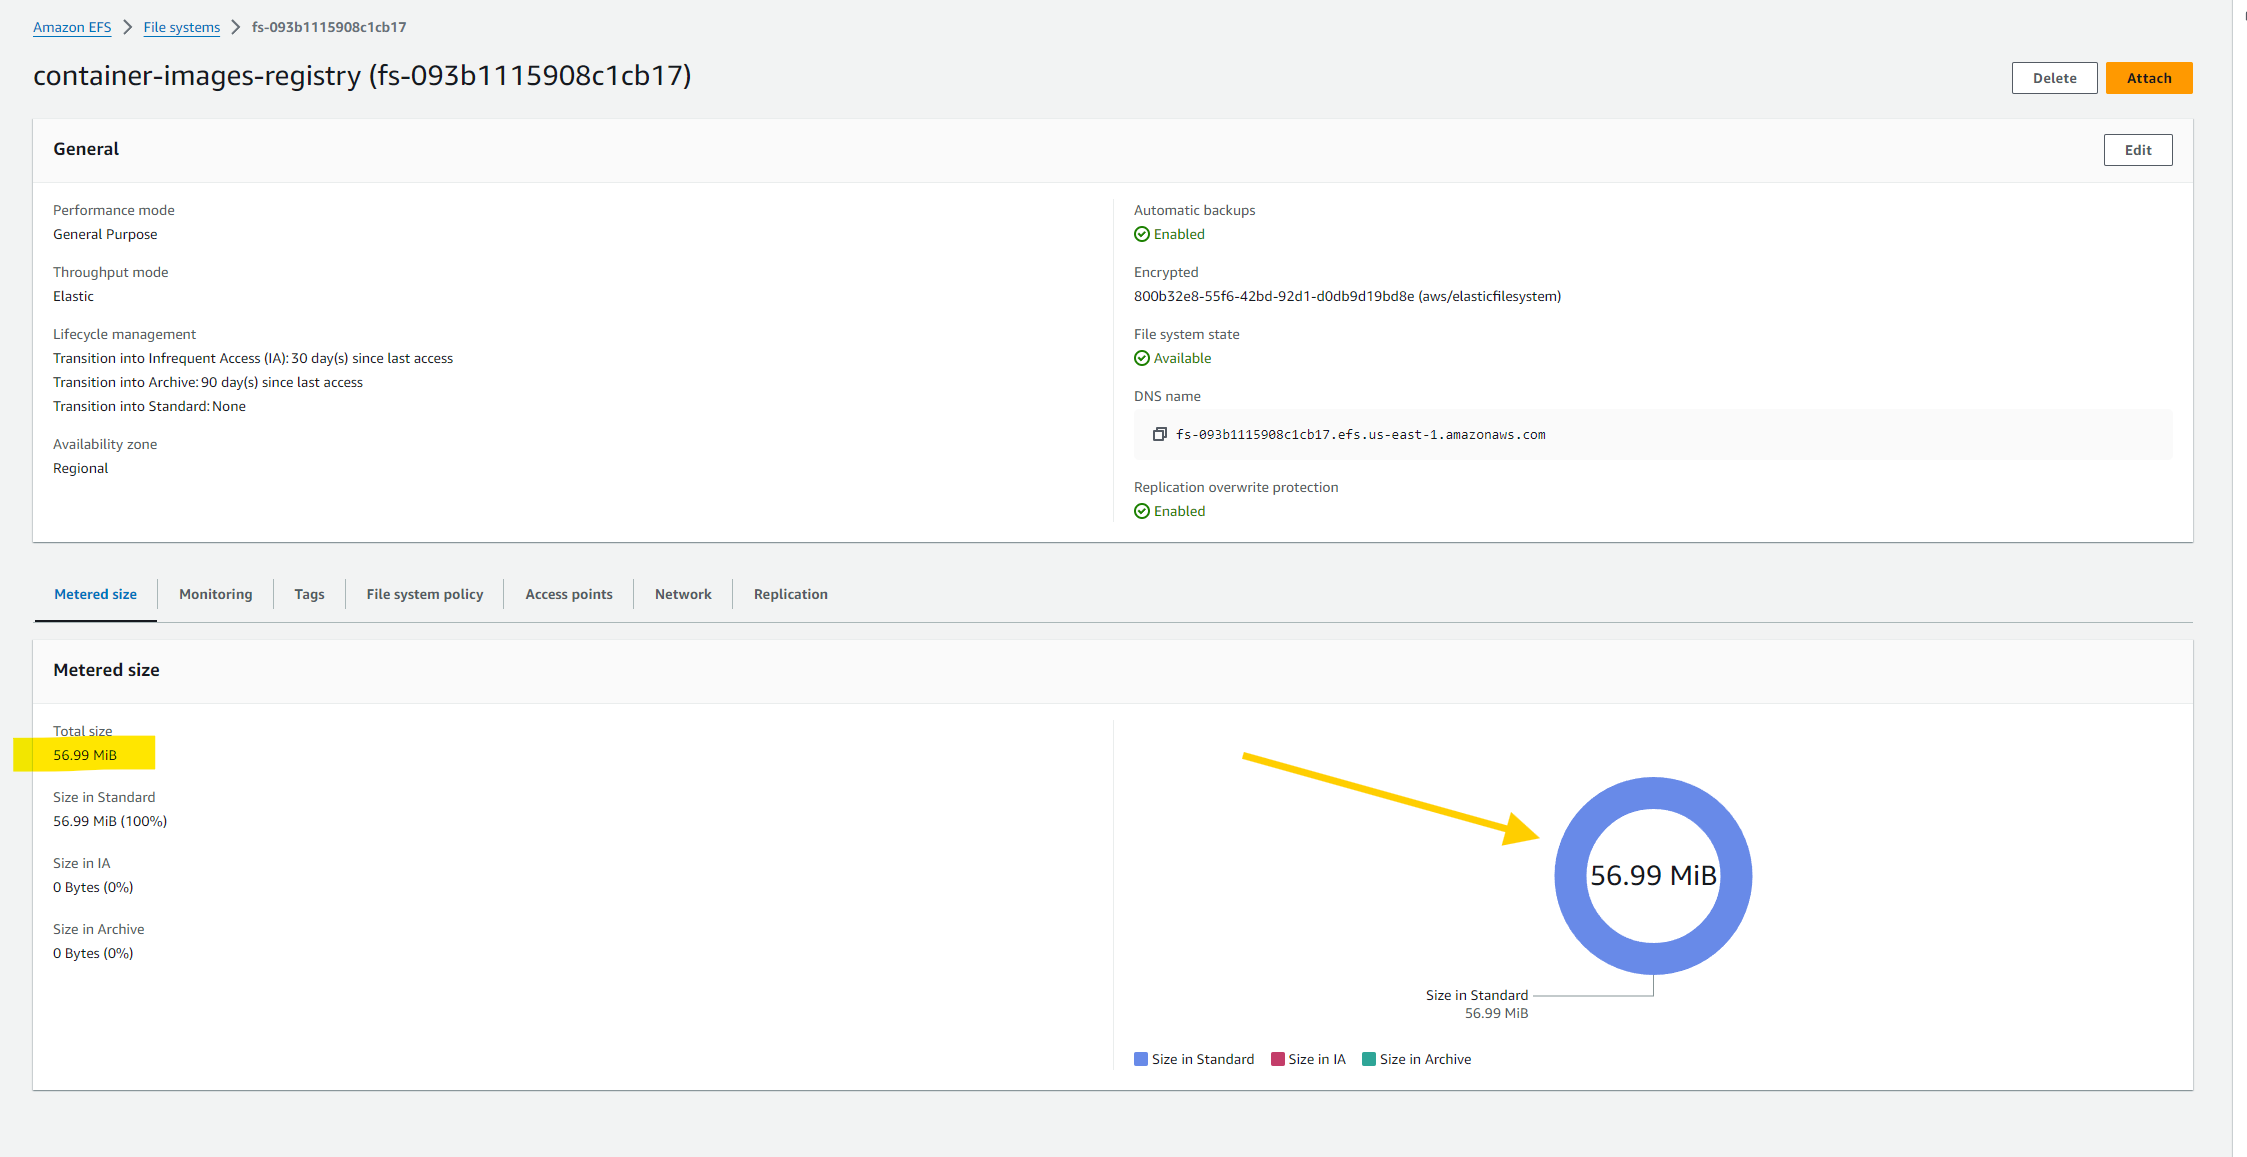
- Similarly, we can push multiple images to our registry. Using EFS as a persistent volume eliminates concerns about storage size because EFS is serverless and elastic.
- We can see the occupied storage by going to the AWS EFS Console & you can also monitor that by AWS CloudWatch.
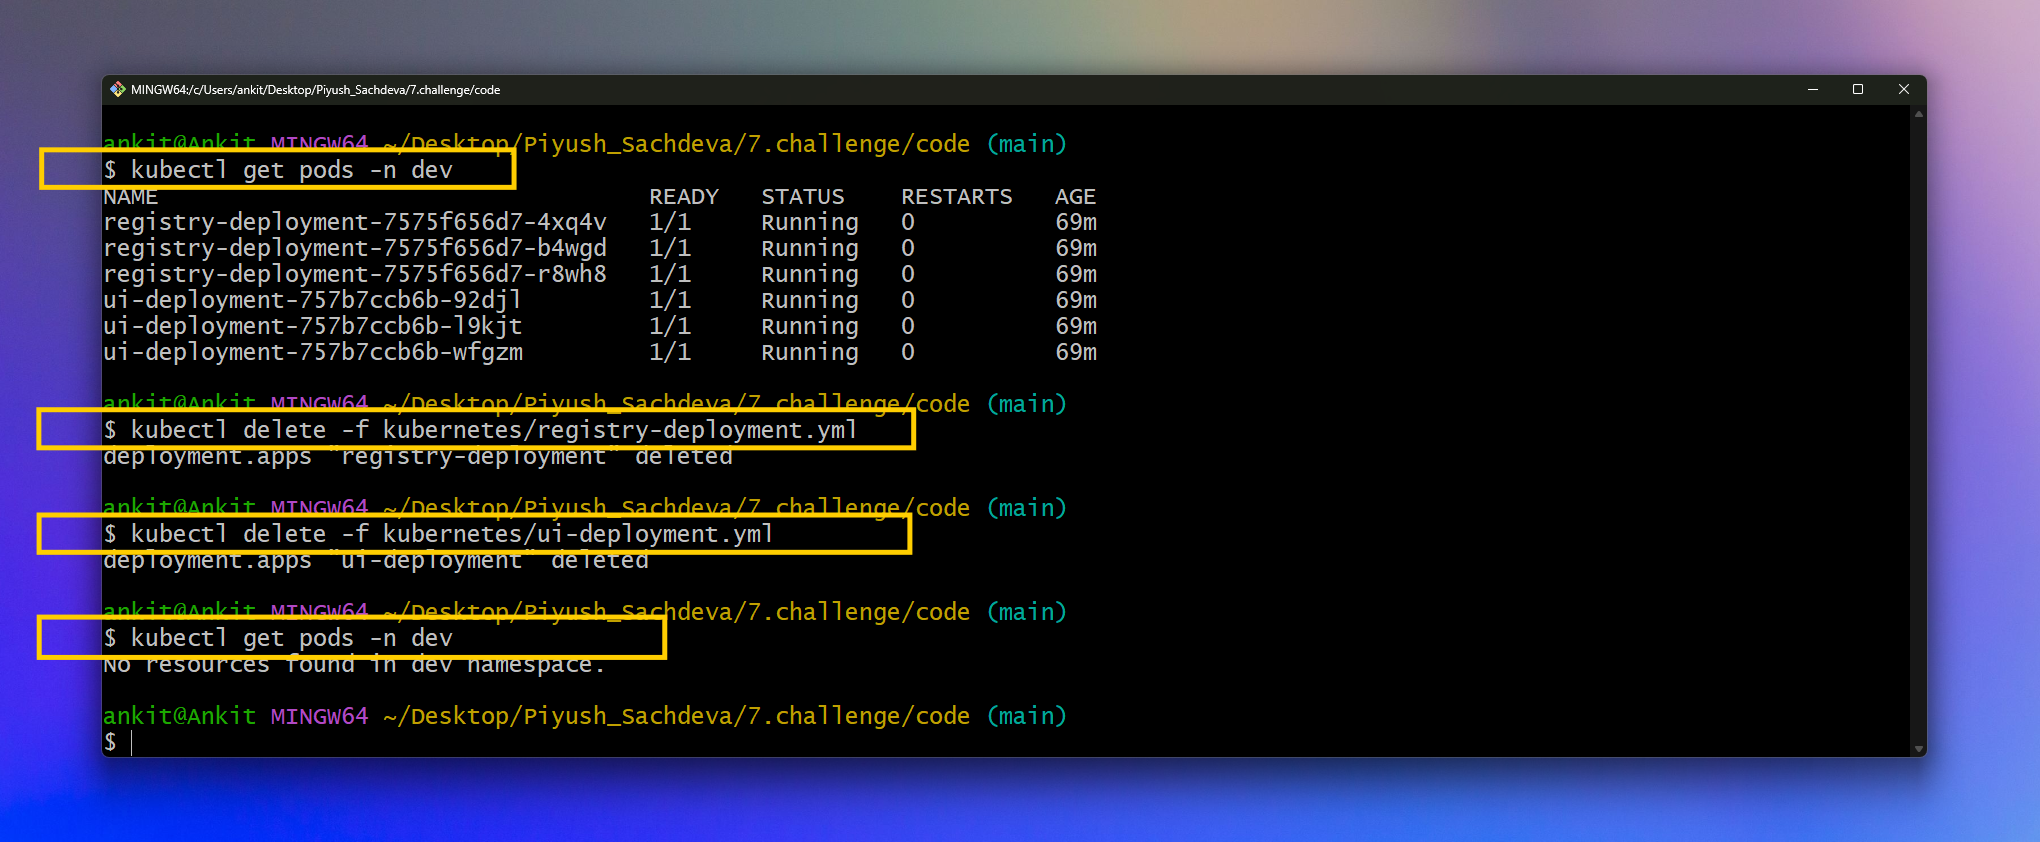
- We are using persistent data storage so let's put that to test by deleting all the Registry & UI pods from our cluster.
# List of Pods
kubectl get pods -n dev

# Delete registry deployment
kubectl delete -f kubernetes/registry-deployment.yml

# Delete ui deployment
kubectl delete -f kubernetes/ui-deployment.yml

# List of Pods
kubectl get pods -n dev
- Now, Let's create these pods again.
kubectl apply -k kubernetes/
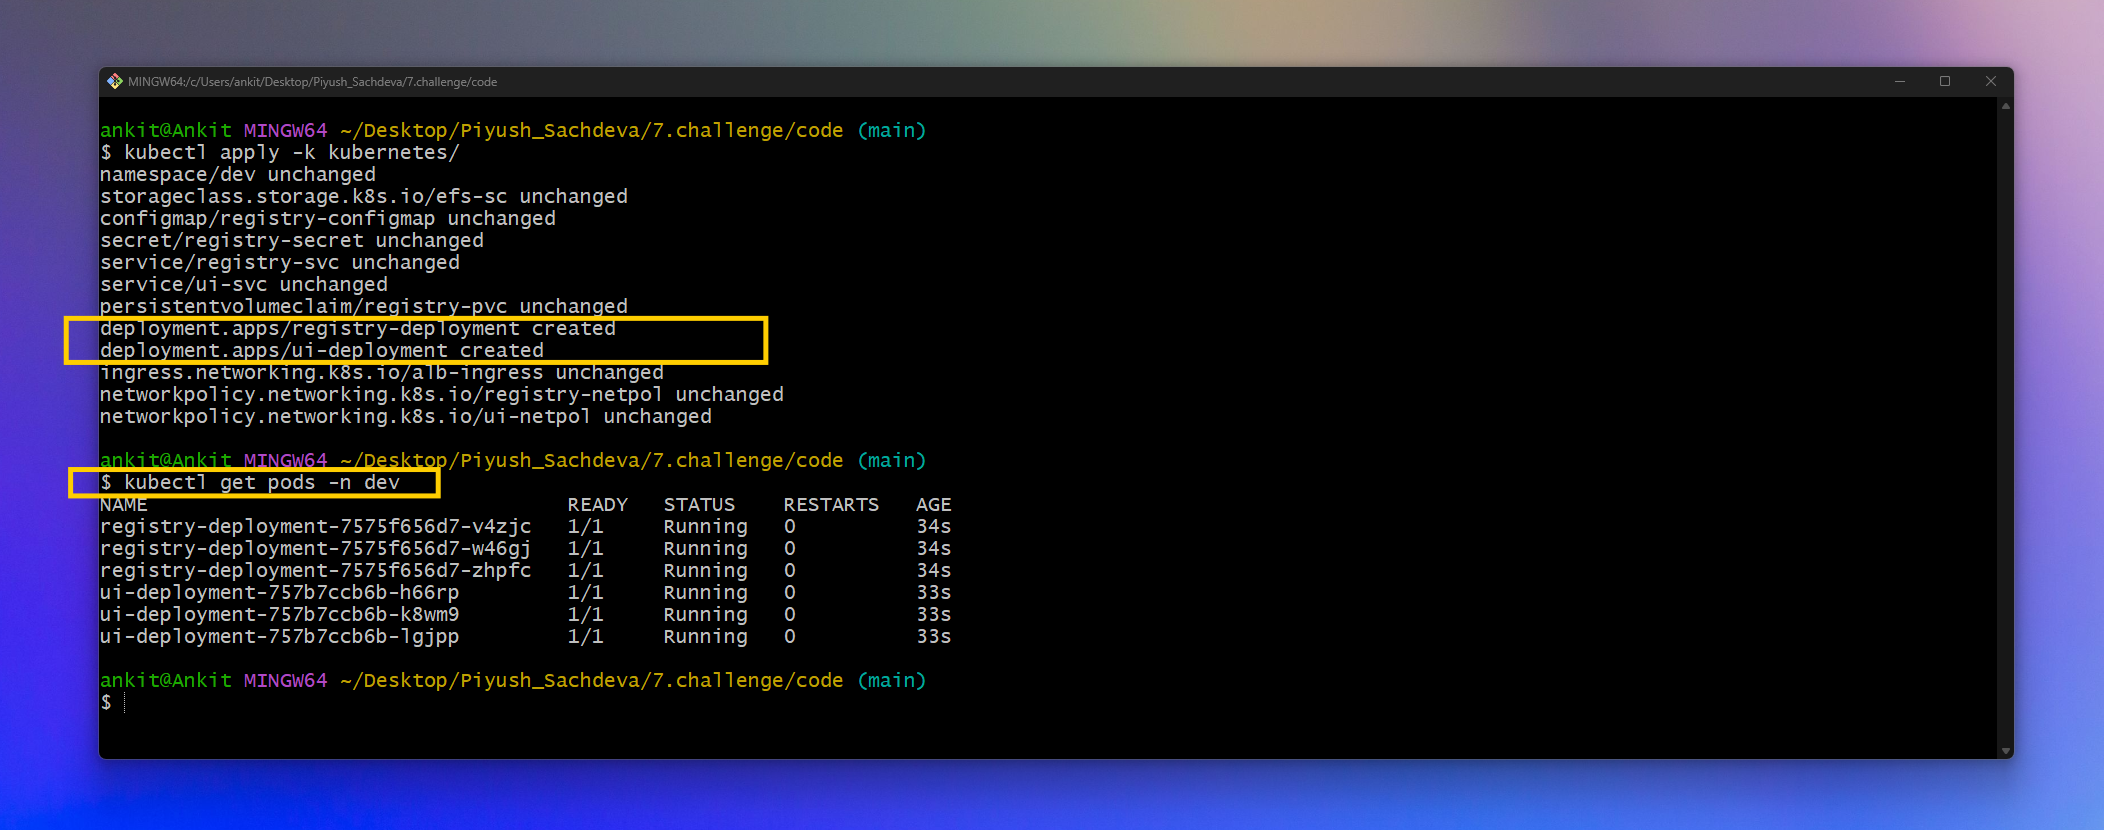
Once, all pods come running state, we can verify the images by visiting the domain name or browser.

- Yeah!! We can see that our images are there. it means that we were able to persist data.
🧹 Cleanup
- Let's destroy the infrastructure to avoid unnecessary changes.
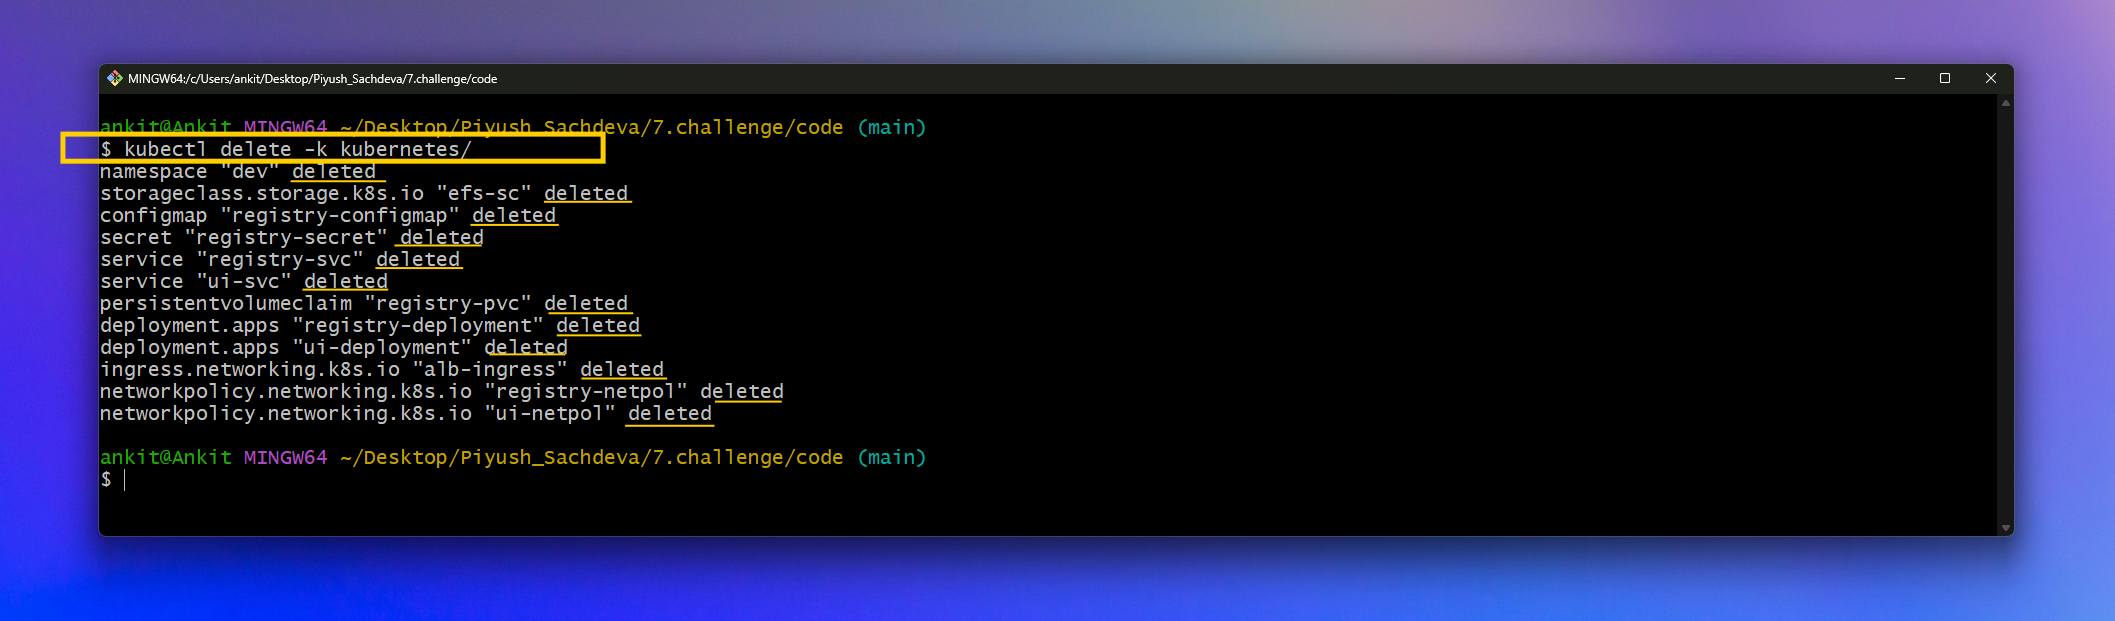
- First, Remove Kubernetes components.
kubectl delete -k kubernetes/
- Second, Delete the file system that we've created via the AWS console.

- Third, Destroy the infrastructure.
terraform destroy --auto-approve
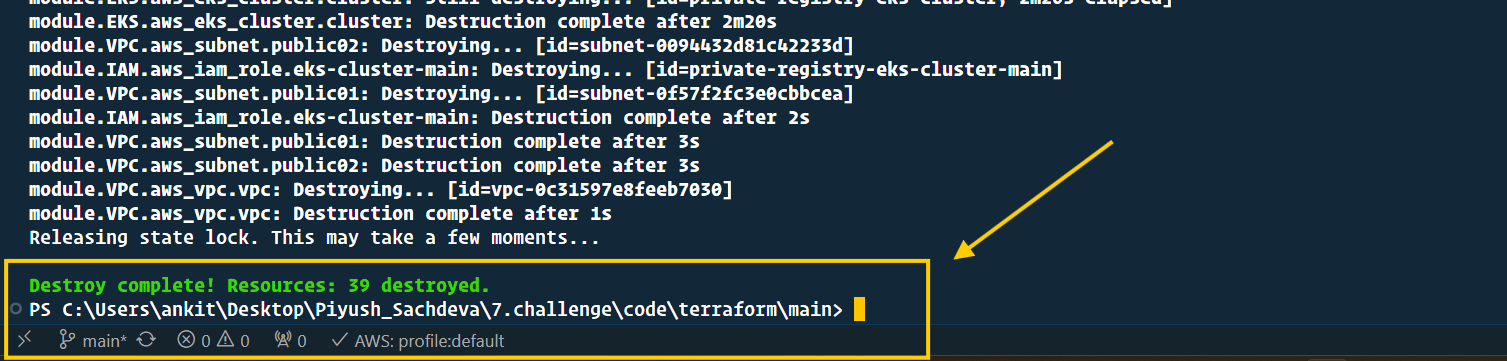
- I recommend you visit the AWS Console & verify everything to avoid unnecessary charges.
🙌 Conclusion
- Finally, in this blog, we explored deploying our own private container registry on the AWS EKS Cluster. We started by provisioning the Amazon EKS cluster using Terraform, ensuring a solid foundation for our deployment
- I aimed to cover all necessary details and best practices. but writing everything in the blog is not possible so I recommend you to dig deeper and check out my Terraform code and Kubernetes manifest files.
- You can implement CICD for Terraform (GitOps approach)
- Use AWS Secret Manager or other tools to store your secrets
And here it ends... 🙌🥂
if you like my work please message me on LinkedIn with "Hi and your country name"
-🙋♂️ Ankit Jodhani.
📨 reach me at ankitjodhani1903@gmail.com
🎒 Resources
https://joxit.dev/docker-registry-ui/
https://hub.docker.com/r/joxit/docker-registry-ui
https://medium.com/clarusway/creating-a-private-container-registry-repository-and-web-service-8c753b54f55c